
Software guide
Getting started with OOOO
Install OOOO, play and record your first tape loop, learn the circle controls, and explore interactive monome grid tutorials.
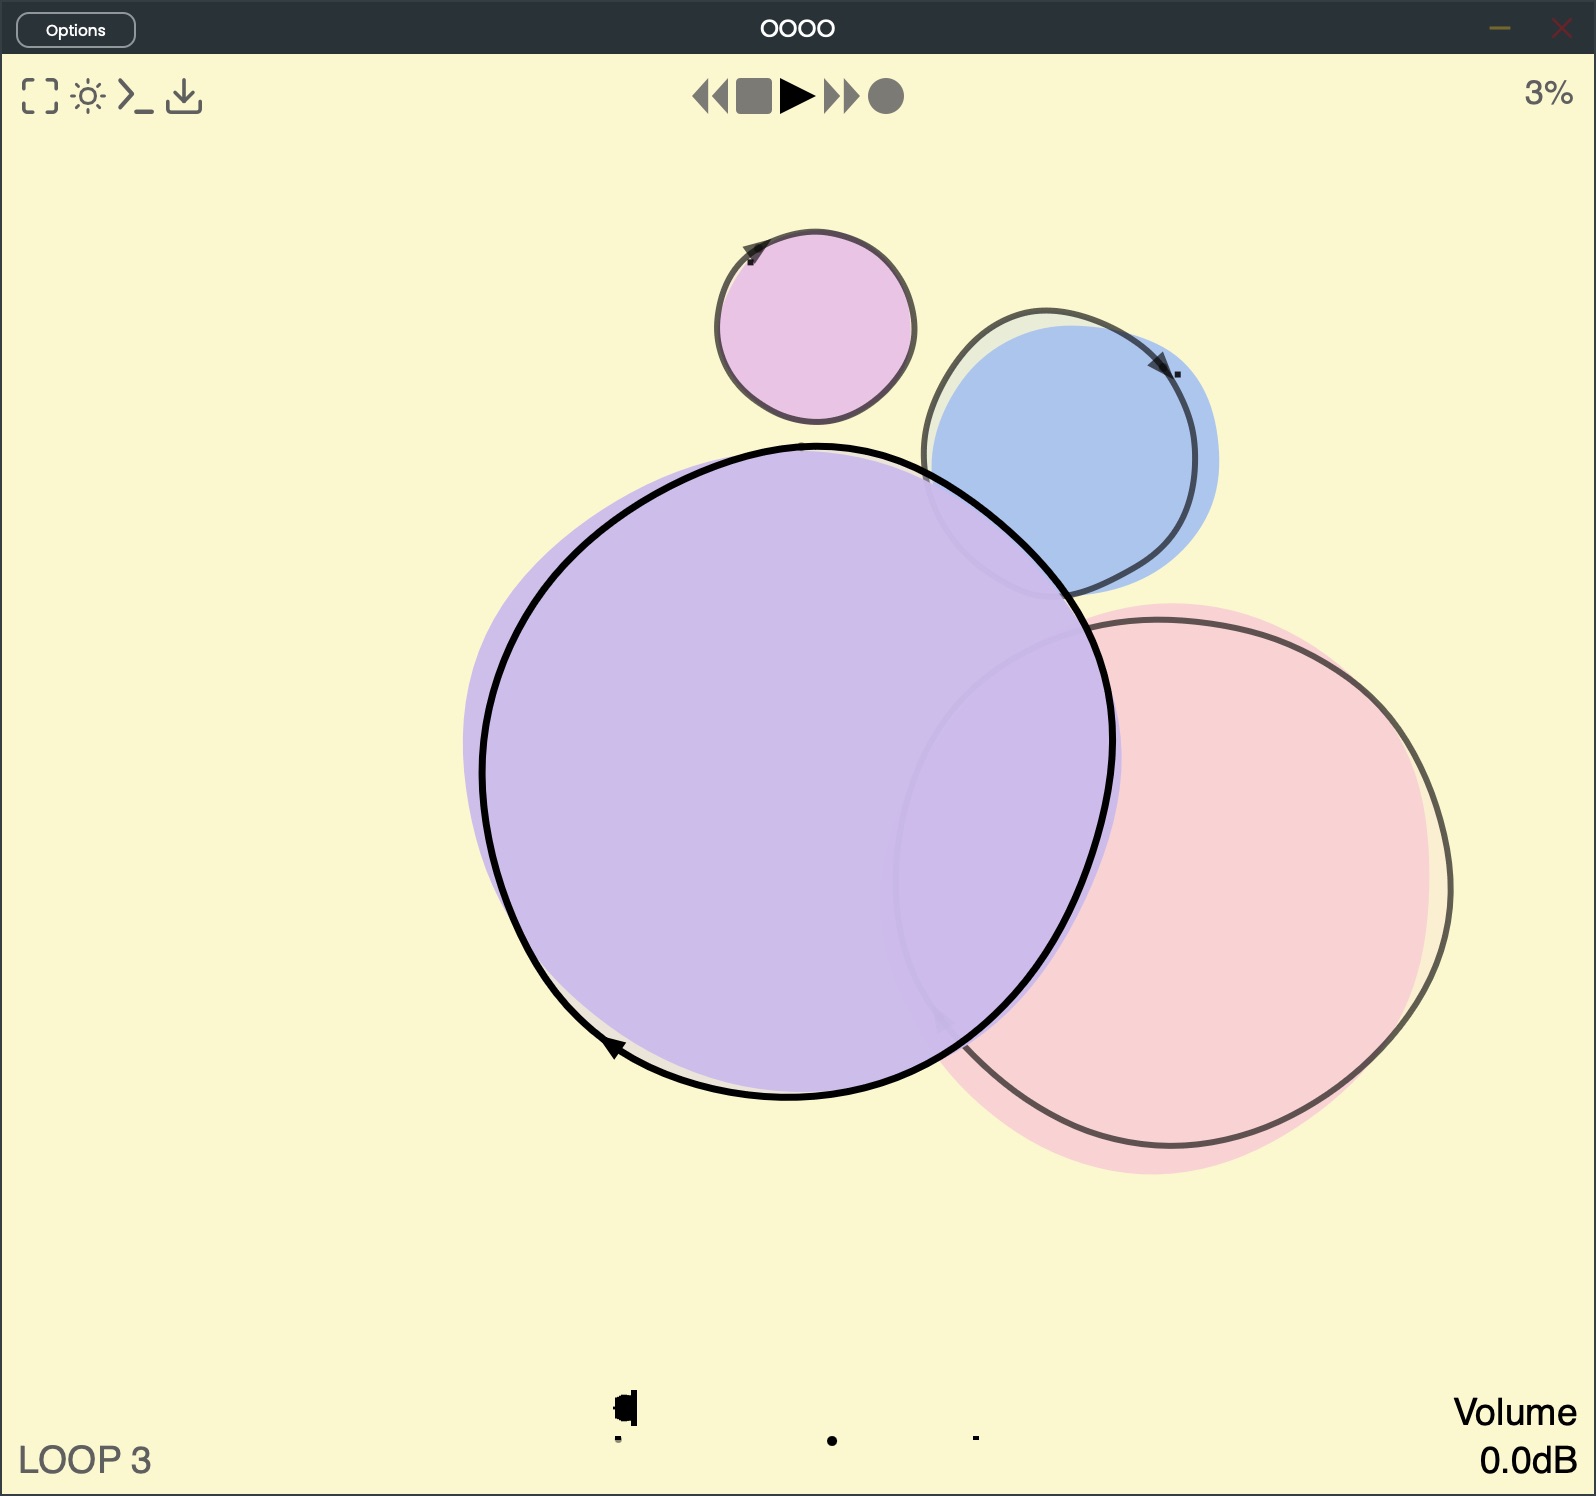
OOOO records and plays digital tape loops. Each circle is a loop: move it to change its pan and volume, change its rate to hear a different speed and pitch, or cut to another point in the recording. Start with one loop. The demo supports this whole first session; a license unlocks multiple loops and loop copy/paste.
Download and install
Download OOOO for your computer. Choose your operating system and, on a Mac, Apple Silicon or Intel. The store selector finds the current installer; you can use the same plugin before and after buying a license.
- macOS: open the downloaded
.pkginstaller and follow its steps. It installs VST3 and Audio Unit (AU) plugins. Use AU in Logic; use VST3 in hosts that support it. - Windows: run the downloaded installer. Keep the standard VST3 location so your host can find the plugin.
- Linux: extract the archive and put the complete
.vst3bundle in~/.vst3/. Keep the bundle's contents together. - Open your DAW and rescan plugins if OOOO does not appear. Restart the host after installation if needed.
In Ableton Live, enable VST3 system folders in the Plug-Ins preferences. In Logic, check the Plug-in Manager if the AU is missing. The walkthrough below uses the plugin inside a DAW; standalone downloads, where available, are listed on the vendor website.
Load and play your first loop
- Load OOOO as an audio effect on an audio track. In Ableton, drop the VST3 onto an audio track; in Logic, load the AU in an Audio FX slot. Enable the track's output and keep the host running if it suspends inactive effects.
- Open the plugin window and click inside the initial circle to select it; the footer identifies the selected loop. Licensed users can press N to create additional loops.
- Drag one local audio file, such as a WAV, from Finder or your file manager into OOOO. Select a loop before dropping the file: OOOO imports it into that loop. If dragging a DAW clip does not work, use the original audio file on disk.
- Press Space or the tape Play button to hear the selected loop. Check the loop's Volume and the global Wet level if it is silent.
- Drag the circle left or right to change pan, and up or down to change volume. Click its edge to jump to another point in the loop.
- Use Left / Right to select Rate in the footer, then Up / Down to change it. Rate 1 is normal speed; changing rate also changes pitch.
Click the plugin window before using shortcuts so it has keyboard focus. Host shortcuts can take precedence. Press H for the in-app help overlay if you need a reminder.
Read the circles and footer
The selected circle chooses which loop you edit. The footer shows one parameter at a time. Scroll through parameters with Left / Right and change the selected value with Up / Down, or drag up and down in an area outside the circles.
- Volume / Pan: the loop's final level and stereo position. Circle dragging gives you both at once.
- Rate: playback speed and pitch. Negative rates play backward.
- Loop Start / Loop Length: choose the active window inside the recording.
- Fade Time: smooth the loop boundary with a crossfade.
- DAW Sync: link loop timing to the host. Turn it off when you want the loop to run independently.
- Reverb: send some of the loop to the shared reverb.
Double-click outside all circles to deselect the loop and reach the global parameters. Global Input trims incoming audio, Dry sets direct input at the output, and Wet sets the processed loop output. Select a circle again to return to its parameters.
With a loop selected, Space toggles that loop's playback. The tape Stop button stops playback; pressing Stop again when stopped returns to the beginning. You can explore independent loops after licensing, but there is plenty to hear by moving one loop around.
Record audio into a loop
- Feed audio into OOOO from an earlier device or a clip on its track. For a live source, choose the track's input and enable the DAW's monitoring.
- Select the loop and set its Loop Length before recording. Make global Input and the loop's Input Live audible.
- For a simple single pass, choose Record Mode → Once. Press R or the tape Record button; recording disarms after one loop span, with post-roll based on Fade Time.
- Play the captured loop. Adjust global Dry if you also hear the live source and want to hear only the recorded loop.
Continuous mode keeps recording until you stop it. Record New controls the new audio written into the loop; Record Keep controls how much existing audio survives each overdub. Start with Once so you can hear one pass before trying repeated overdubs.
Manually stopping Continuous recording does not normally shorten the loop: global Record Truncation is off by default. See the full manual before changing that behavior.
Save your session
With the plugin focused, hold O for about one second to open the session-save dialog. Choose a name and save the .zip session archive. Hold I to open a saved archive later. Loading a session replaces the current session, so save work you want to keep first.
Keep the ZIP intact when moving it to another computer. A session archive is the portable way to save the loops and their settings. The Z preset shortcut is separate: a quick press loads a preset, while holding it saves the slot.
Play the loop from MIDI
Route a MIDI track or controller into OOOO using your host's MIDI-to-effect routing. Select the loop's MIDI CH so it accepts that channel. Notes play the loop at different pitches; middle C (MIDI note 60) plays at the loop's current Rate.
Note Mode chooses where each note starts, and Note Attack, Decay, Sustain, and Release shape the note envelope. Begin with the normal loop playing; then stop its transport if you want to hear only the notes. The full MIDI reference covers channel routing and CC controls.
Explore the monome grid
A monome grid is optional. Each 8×8 tile controls one loop: the first column selects modes and transport actions, and columns 2–8 form the performance area. A 16×8 grid has two tiles side by side.
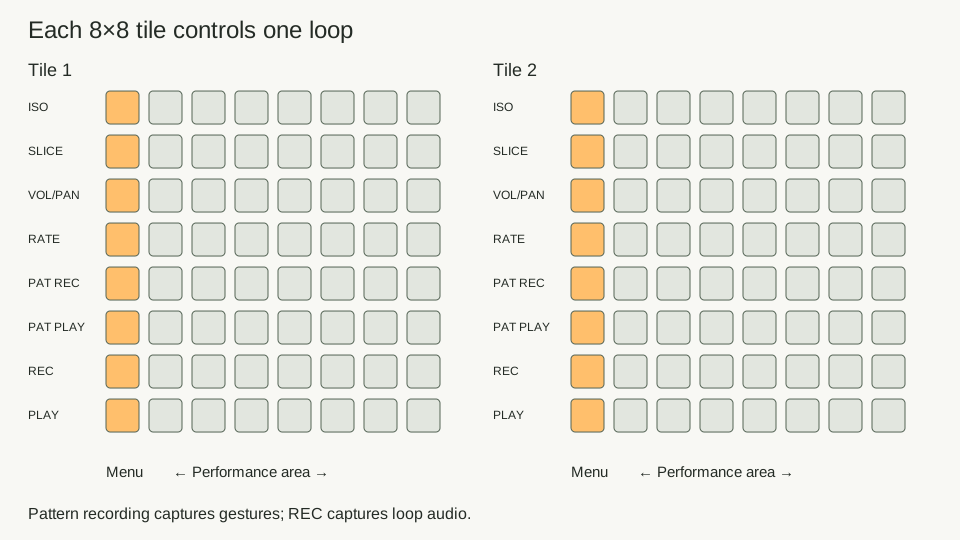
- Isomorphic: play notes in the performance area; matching pitches share highlights.
- Slice: release one pad to jump, or release while another pad is held to set a loop span.
- Volume/Pan: columns set pan and rows set volume. Releasing two points can set modulation ranges.
- Rate: choose speed and direction on release, or use two points for a rate LFO.
- Pattern Record / Pattern Play: record and replay your gestures separately from recording the loop's audio.
These visual tours show the grid gestures without connecting hardware or producing audio. Choose a tour, then use Next and Previous. Left / Right also move between steps while the tour has focus; Escape closes it.
The diagram and written instructions above remain available when interactive tours cannot load.
OOOO detects a connected grid automatically. It uses serialosc when available and otherwise tries its direct driver. See the vendor's grid reference for setup and the complete gesture rules.
Activate your license
Get your OOOO license when you are ready to unlock the paid features. Sign in to your store dashboard with the email used for your purchase. Copy the matching key and paste it into the plugin's license dialog, then activate it. Key validation needs an internet connection.
You can also choose Download License in the dashboard. Keep the filename license.json and place it in the matching configuration folder:
- macOS:
~/Library/Application Support/OOOO/ - Windows:
%APPDATA%\OOOO\ - Linux:
~/.config/OOOO/
Create the product folder if it does not exist, then reopen the plugin. Each plugin uses its own license file and folder. If your purchase has not appeared yet, check the purchase email and make sure the dashboard is signed in with that same address.
If something is not working
- No sound: select a loop, import audio or record into it, then play it. Check loop Volume, global Wet, track output, and whether the host is processing the effect.
- File import fails: select a loop first, drop exactly one local file, and try a WAV from your file manager rather than a DAW clip.
- Recording is empty: check the track's audio input or earlier devices, monitoring, global Input, Input Live, and Record New.
- Shortcuts do nothing: click the plugin window and make sure no text field has focus. Your host may intercept keys.
- Cannot add another loop: the demo is limited to one loop. A license also unlocks loop copy/paste.
- Plugin missing: use the matching AU or VST3 format and rescan the host after installation.
For activation problems, confirm the purchase email, key, and internet connection. Keep the exact error for support.
Go further
The full OOOO manual covers loop-to-loop routing, LFOs, tape and filters, global parameters, and scripting. The vendor's examples show different ways to perform with it. For help, email zack@infinitedigits.co with your version, operating system, and host.