Instrument manual
Pikocore Guide
Pikocore is a tiny, hackable sampler built for mangling sounds on the fly. This guide covers loading samples and firmware, building the hardware, playing it, syncing it, and fixing common problems.
Current firmware and samples
Current v2 devices use the browser-based Pikocore Loader. It downloads the correct UF2 firmware and connects over USB-C to read, edit, and upload sample banks. Original v1 devices are covered in the legacy archive below.
Demo
More background is available in the Studio Brootle interview and the DJ Iceman review. Assembled devices are also sold by Perfect Circuit, and UK DIY kits are available from Thonk.
DIY build
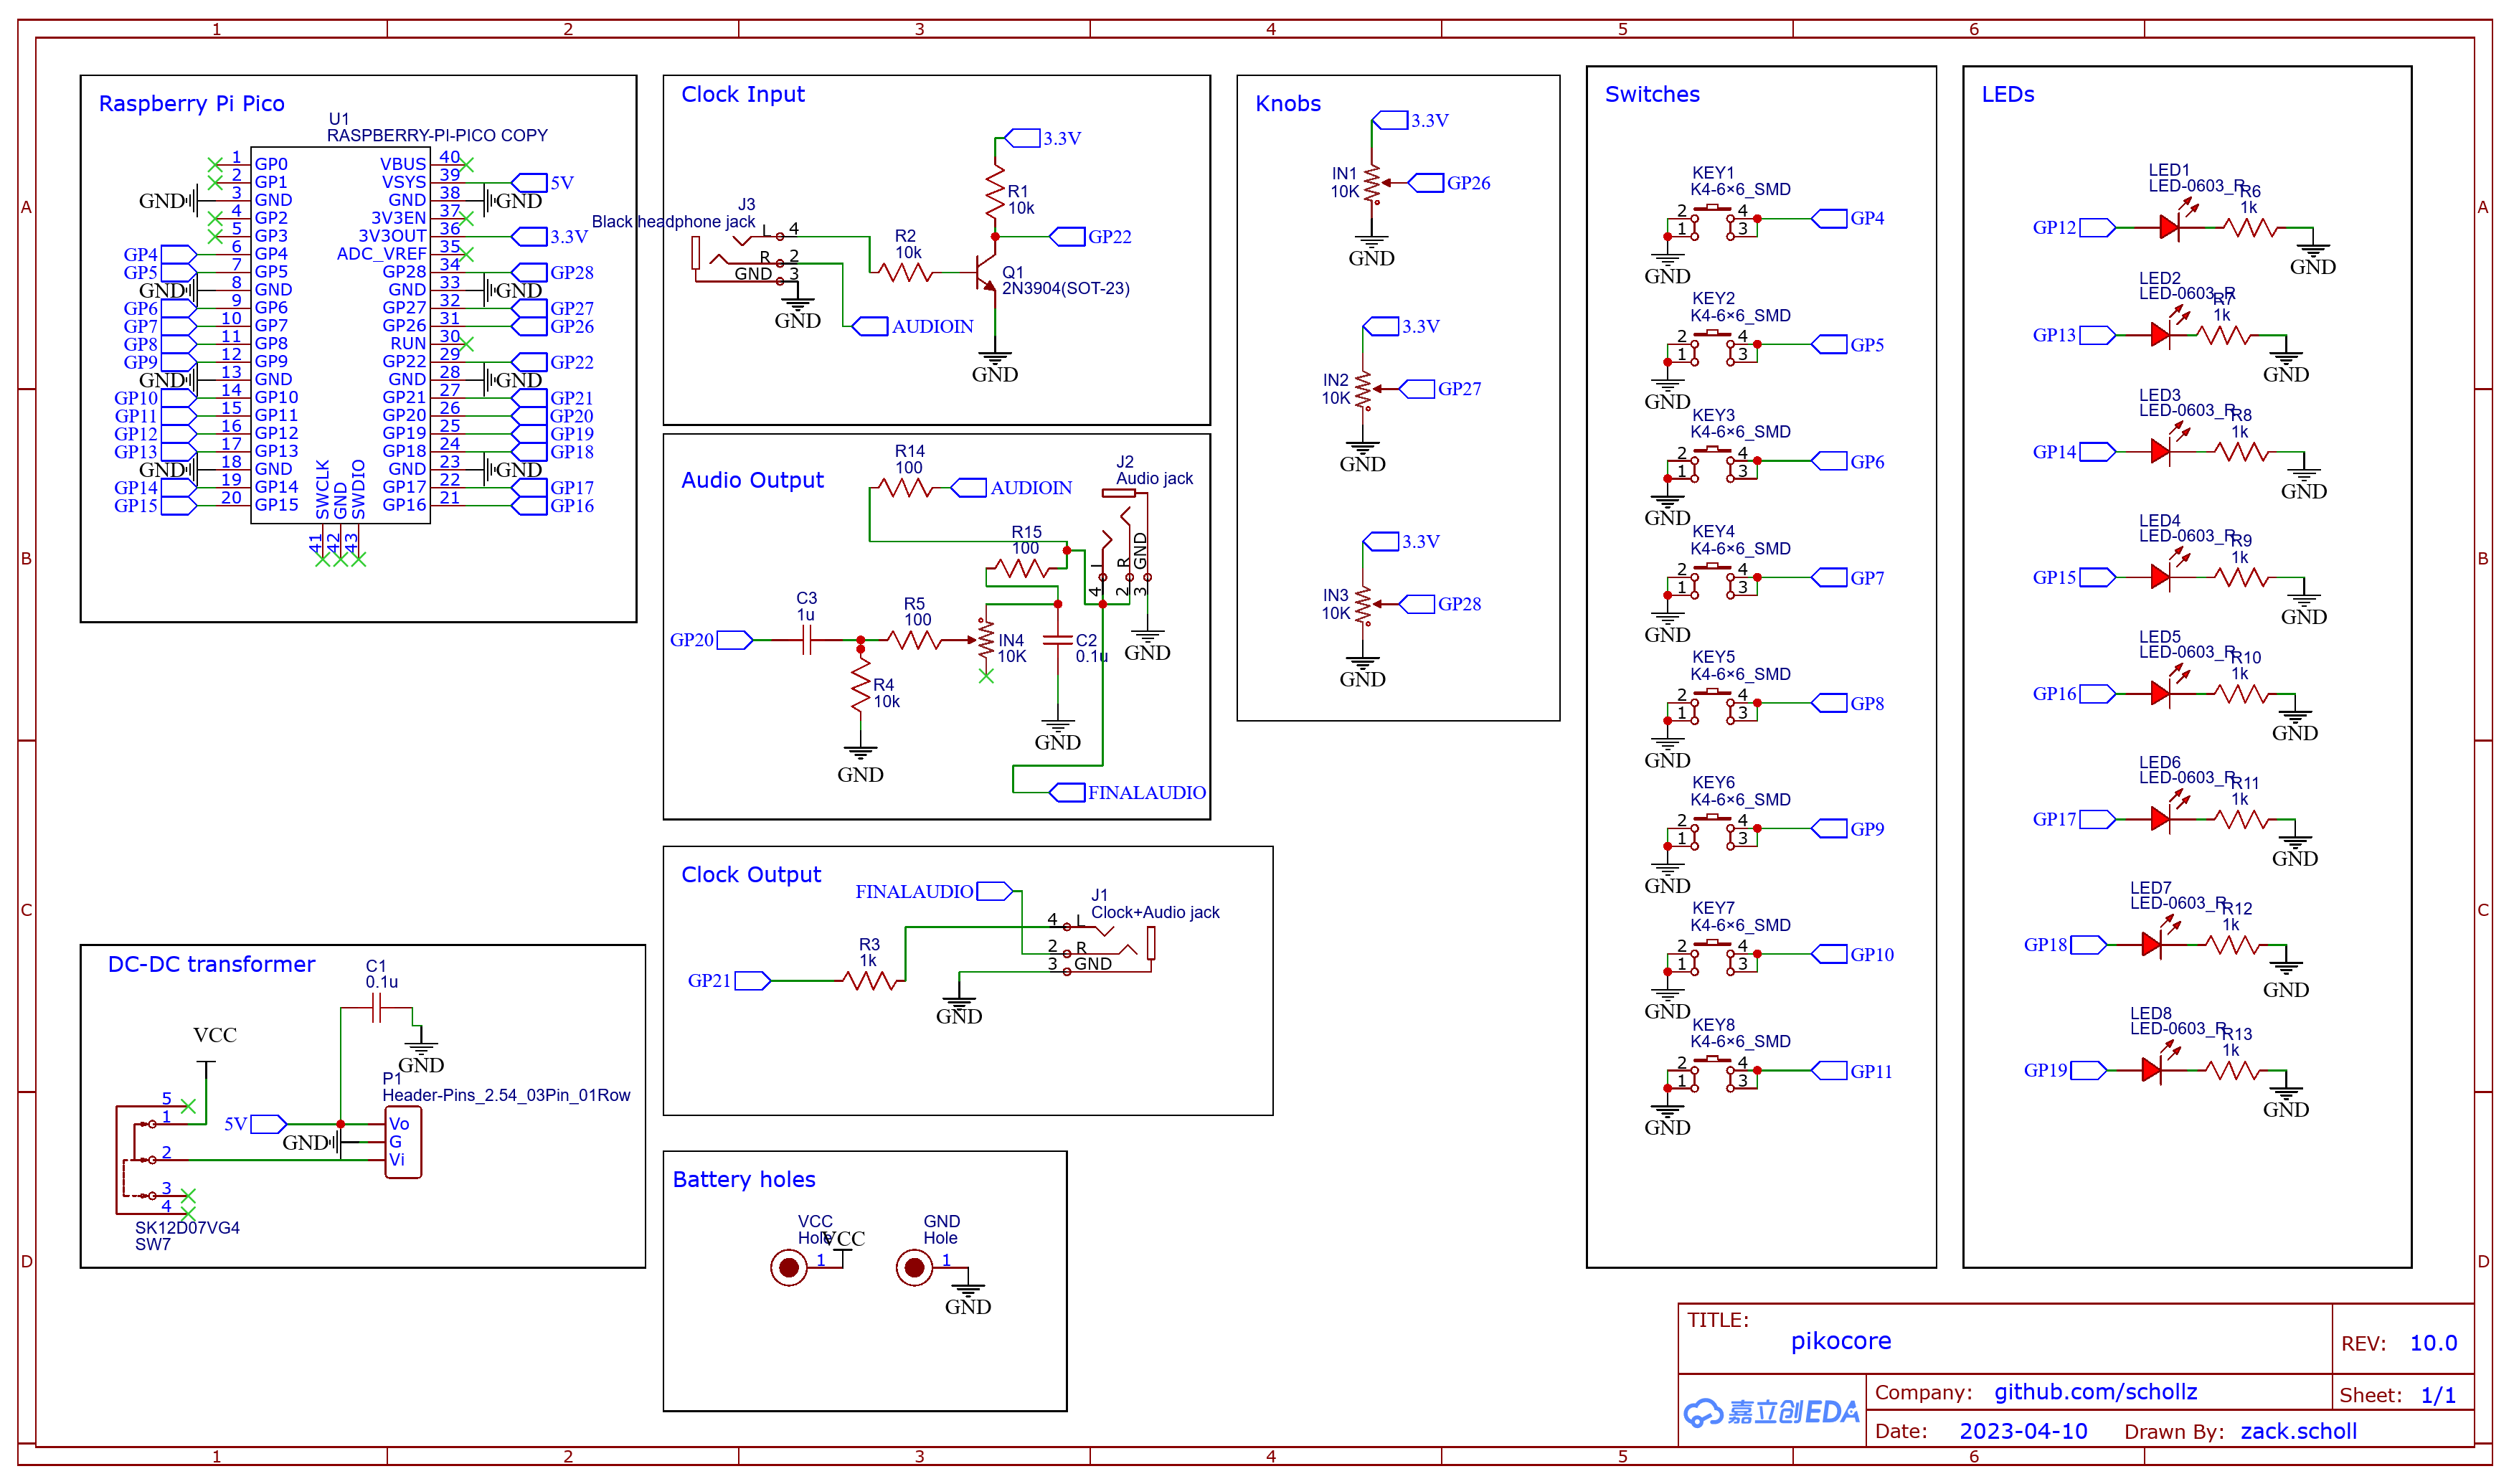
Noise Kitchen developed an alternative illustrated build guide. Download the PDF build guide, then use the schematic and bill of materials below. Pikocore hardware and firmware source is available on GitHub.
Schematic
Bill of materials
| Item | Quantity |
|---|---|
| Pico with RGB | 1 |
| 5V DC-DC step-up | 1 |
| 1.8 mm LED | 8 |
| PJ-320B straight audio jack | 3 |
| 6 × 6 × 4.5 mm button | 8 |
| AAA battery holder, 45 mm pin spacing | 1 |
| SPDT switch | 1 |
| 1 × 3 male header | 1 |
| 10 kΩ potentiometer, RV09 12.5 mm | 4 |
| 1 × 20 female header | 2 |
| 1 × 20 male header | 2 |
| 0.1 µF capacitor | 2 |
| 1 µF capacitor | 1 |
| 10 kΩ resistor | 3 |
| 1 kΩ resistor | 9 |
| 100 Ω resistor | 3 |
| 2N3904 NPN transistor | 1 |
Playing Pikocore
Basics and I/O
Pikocore has eight buttons and four knobs. The top-left jack receives a trigger or Pocket Operator sync signal. The top-right jack is the main audio output. The bottom-right jack carries trigger and audio for Pocket Operator-style sync. Use stereo 3.5 mm cables for every input and output.
Buttons
- Jump: press any button to jump to that relative position in the sample.
- Retrigger: hold one button and press another. The second button selects the retrigger speed; randomized pitch, filter, speed, or volume envelopes may also be applied.
- Stop/play: press the two leftmost and two rightmost buttons at the same time.
Button mashing is encouraged.
Knobs
The rightmost knob controls filter and output level. The leftmost selector knob chooses one of eight modes; the middle two knobs, A and B, then control that mode’s parameters.
| Selector | Knob A | Knob B |
|---|---|---|
| 1 | Sample | Break |
| 2 | Filter | Stretch |
| 3 | Gate | Gate probability |
| 4 | Jump probability | Retrigger probability |
| 5 | Tunnel probability | Reverse probability |
| 6 | Sequencer record | Sequencer on |
| 7 | Save | Load |
| 8 | Volume/fold | Tempo |
- Sample
- Selects among more than 100 samples totaling roughly eight minutes.
- Break
- Moves all probabilities together using varied easing functions.
- Filter
- Controls the resonant low-pass filter.
- Stretch
- Applies a deliberately lo-fi timestretch effect.
- Gate / gate probability
- Controls gating amount and the likelihood that it occurs.
- Jump / retrigger / tunnel / reverse probability
- Sets the chance of changing step, repeating, changing sample, or reversing direction.
- Sequencer
- Records as many as 128 steps; turn clockwise to record or enable, counter-clockwise to erase or disable.
- Save / load
- Saves and recalls probabilities, sample, volume, and tempo.
- Volume/fold
- Changes volume and introduces wavefolding.
- Tempo
- Selects 50–305 BPM in 5 BPM steps and displays the value in binary.
Sync and tempo
Pikocore uses a 2 PPQN audio click and accepts a maximum 3V sync signal. Connect a Pocket Operator in
SYN1 to the upper-left input. Use the lower-right output and set the receiving Pocket Operator
to SYN4, or SYN5 when the chain continues.
Firmware 1.2 and newer can lock the clock so jumps do not pull the beat off-grid. Press the middle four buttons together to toggle clock lock: yellow means on and teal means off.
Tempo LED helper
Set selector position 8, then turn knob B until Pikocore’s LEDs match this pattern. Hardware clock accuracy is approximately ±2%.
MIDI
MIDI in
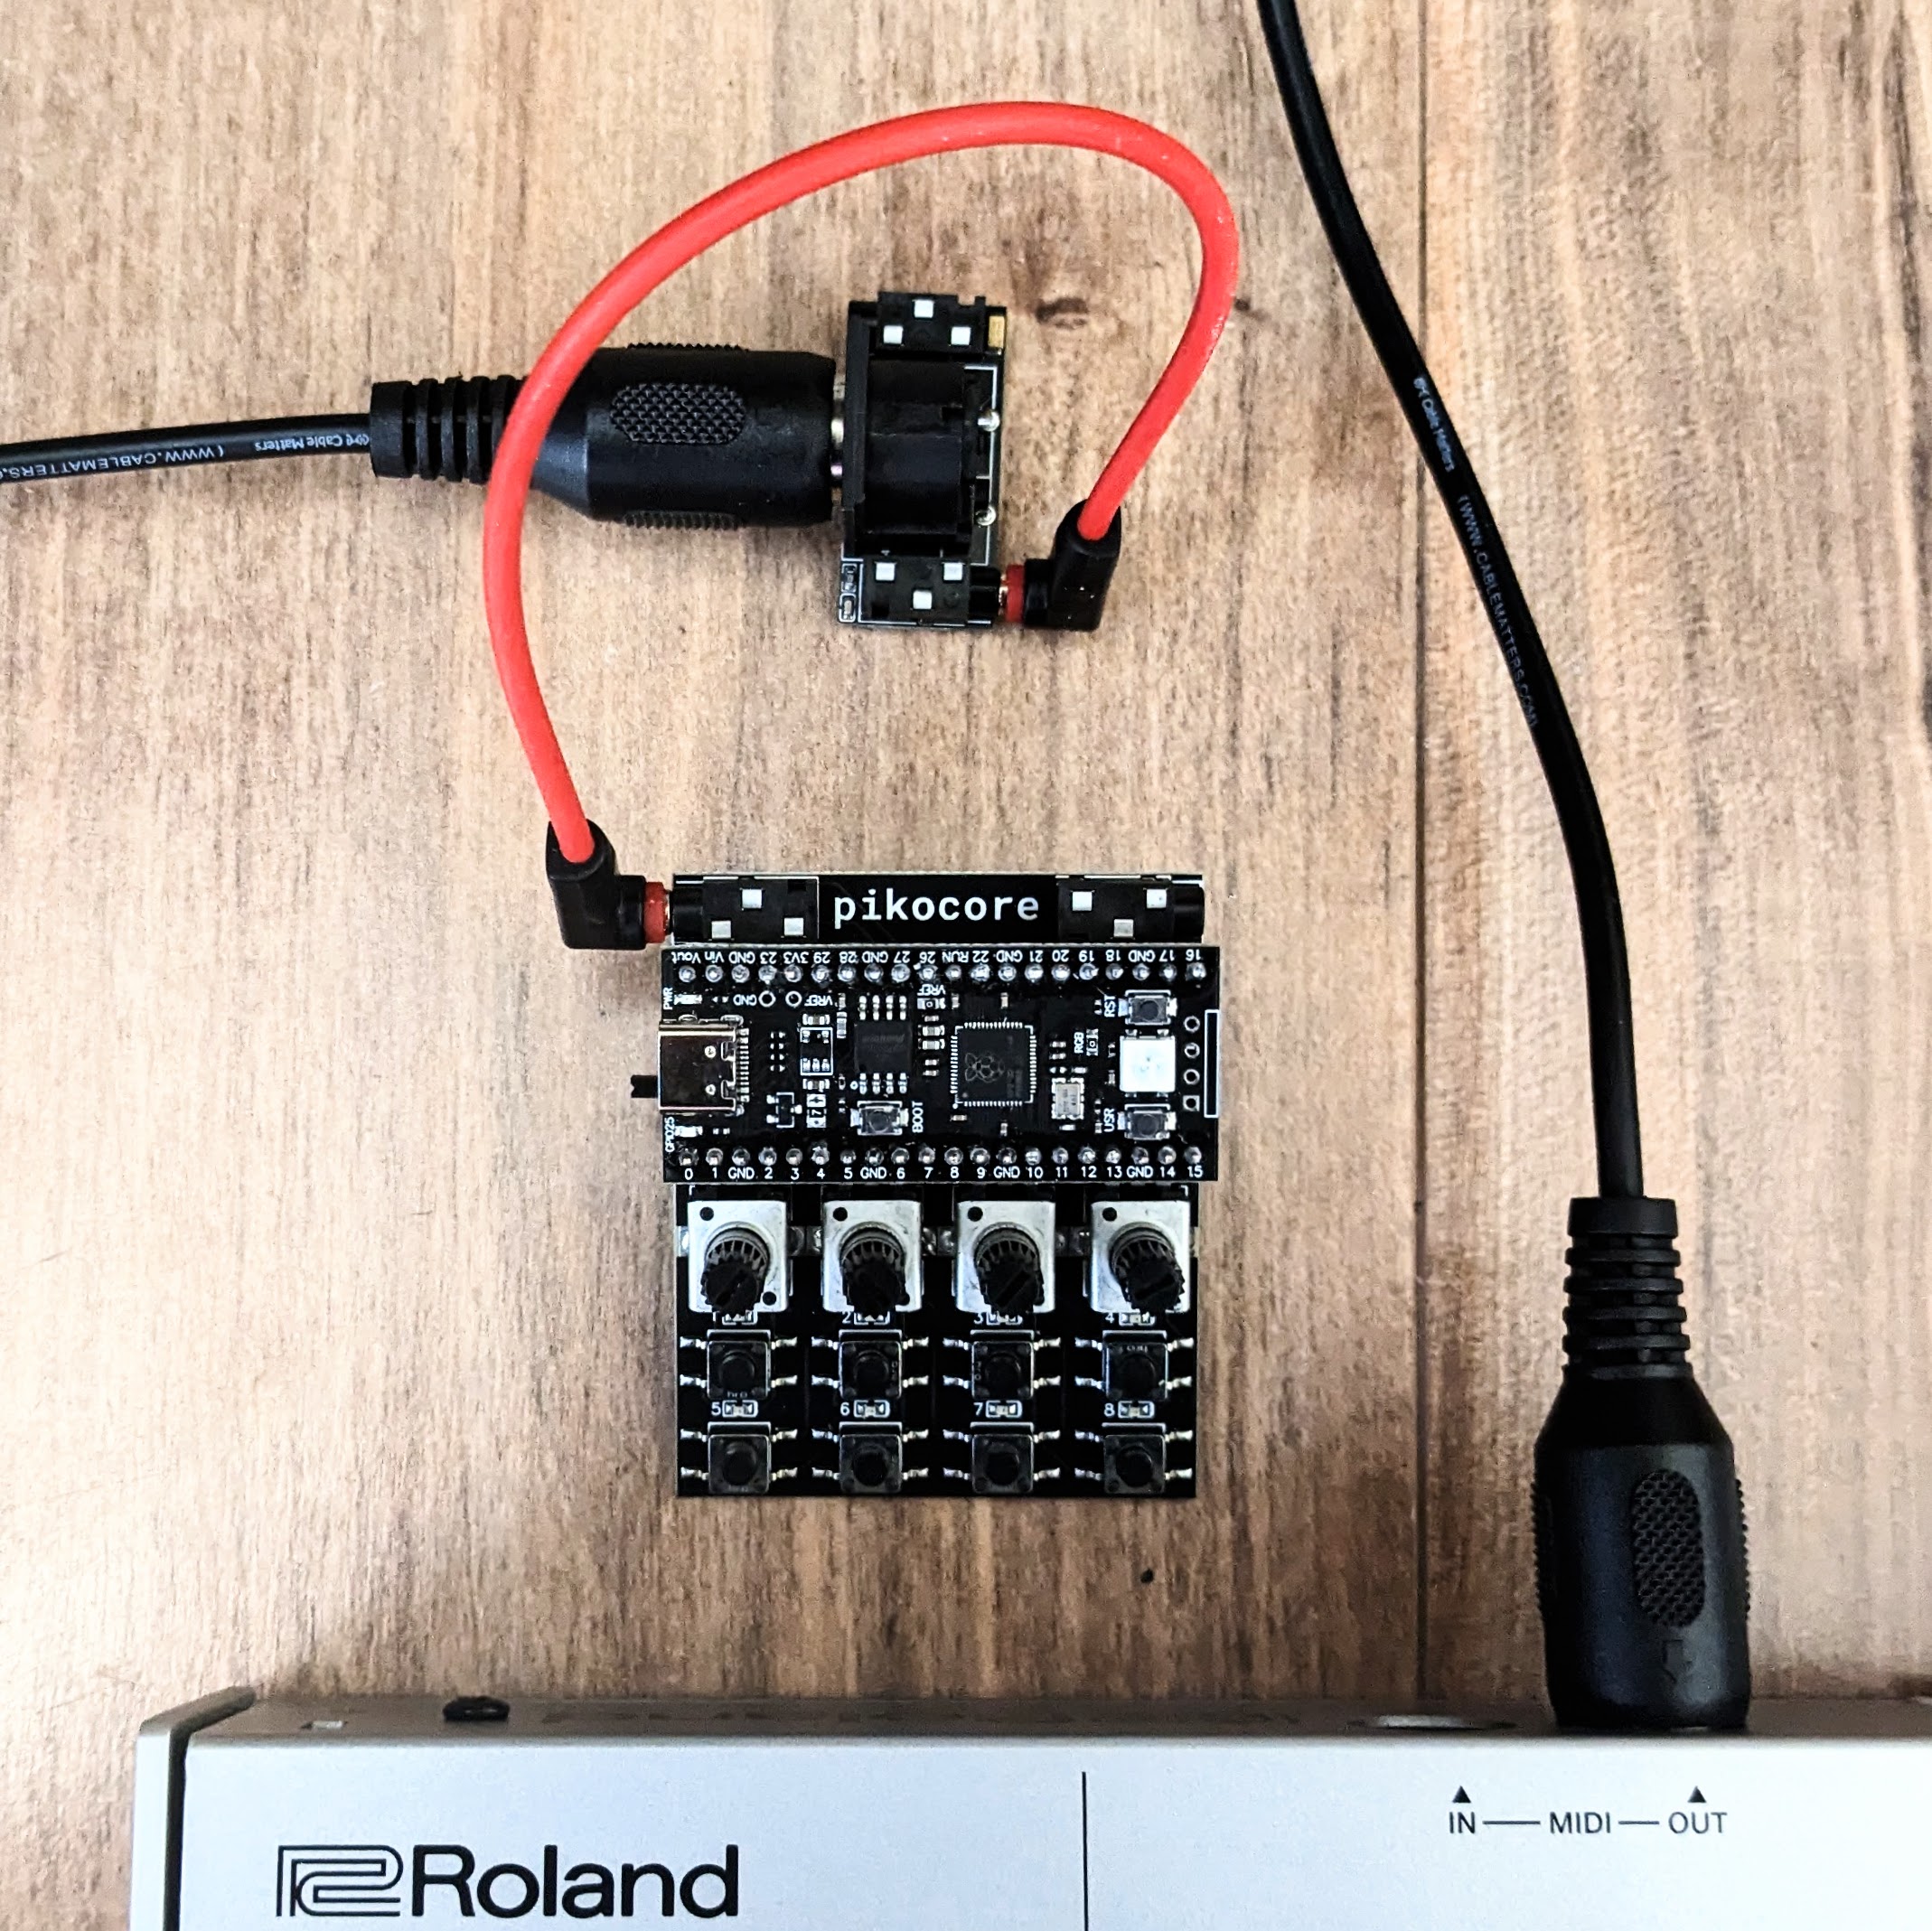
Connect an Itty Bitty MIDI adapter to the clock input. Enable MIDI input in the Pikocore Loader firmware settings. Pikocore follows MIDI clock and start, stop, and continue messages; firmware settings also choose clock division and whether keyboard notes act like the eight front-panel buttons.
MIDI out
Firmware 1.3 and newer can send MIDI over USB. Each of the eight steps is a MIDI note. Hold a button and turn the selector knob to change that step’s note.
Flashing firmware
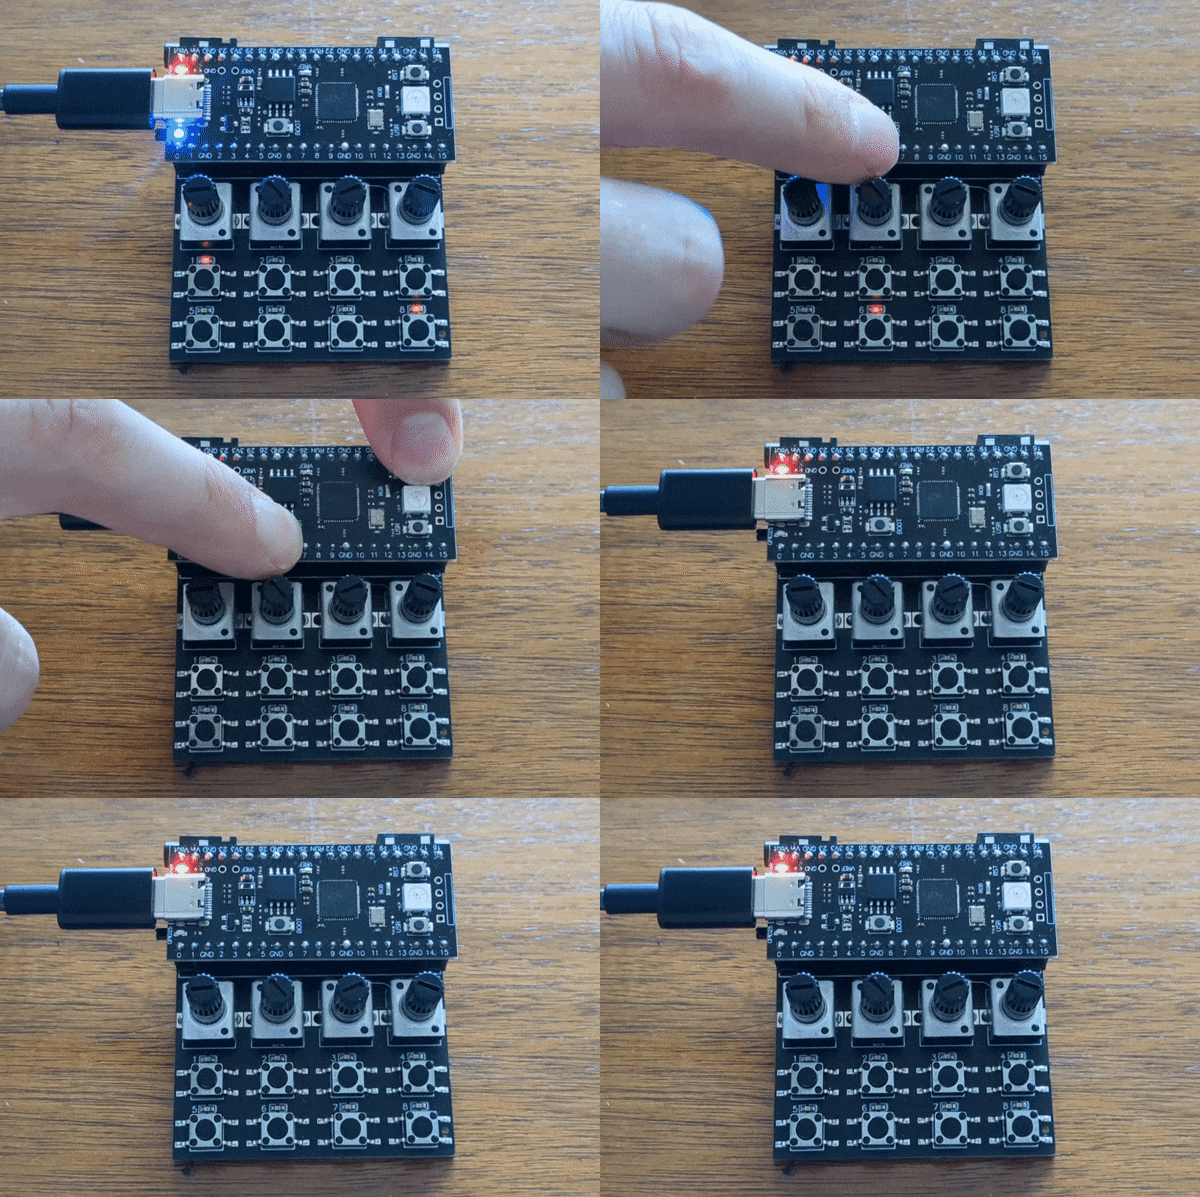
Hold BOOT while connecting USB-C. If the cable is already connected, hold BOOT and press
RST. Download the UF2 from the Pikocore Loader,
then drag it onto the drive named RPI-RP2.
Alternative firmware and community builds
PikoBeats
A drum sequencer by rheslip. View source.
Piko-33
A sample sequencer by rheslip. View source.
Remixes and enclosures
- Arcade enclosure and button box by 2ononen.
- Arcade enclosure by ground_grown_circuits.
- Printable case video, with regular and expanded 3D files.
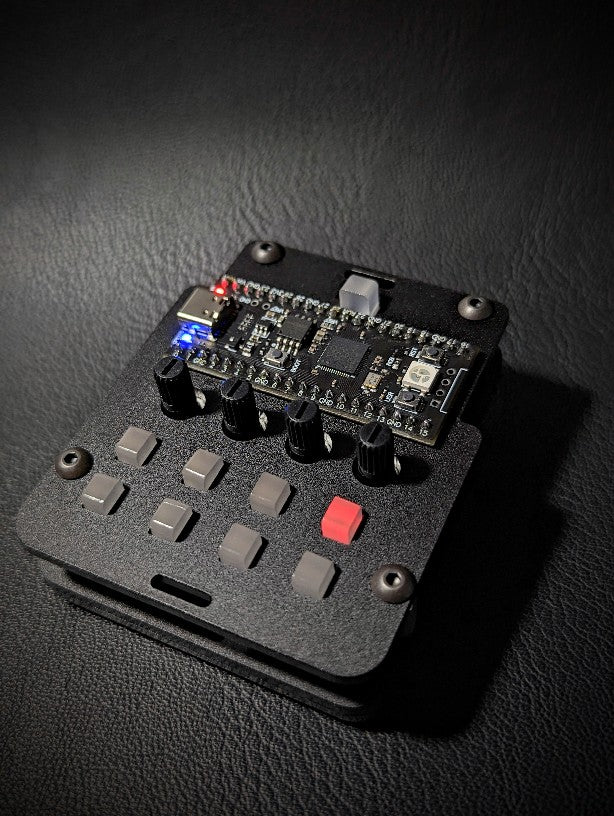
Finished DIY cases are sold separately by Dich Studios. They include translucent buttons, access to the battery, USB and audio ports, a switch cap, rubber feet, and lanyard slots.
Troubleshooting
The battery dies quickly
Use an alkaline AAA battery. Carbon-zinc batteries drop below the required voltage sooner even when some charge remains.
The audio is very quiet
Use a stereo 3.5 mm cable and make sure it is inserted completely. A mono plug can cause very low output.
There is a high-pitched sound
Turn the potentiometers counter-clockwise, rotate the AAA battery in its holder, or test with a USB power bank.
There is no sound, or it sounds muffled
At selector position 2, turn knob A fully clockwise and knob B fully counter-clockwise to reset filter and stretch. Then use selector position 8 and raise knob A to restore volume.
The RP2040 module does not work
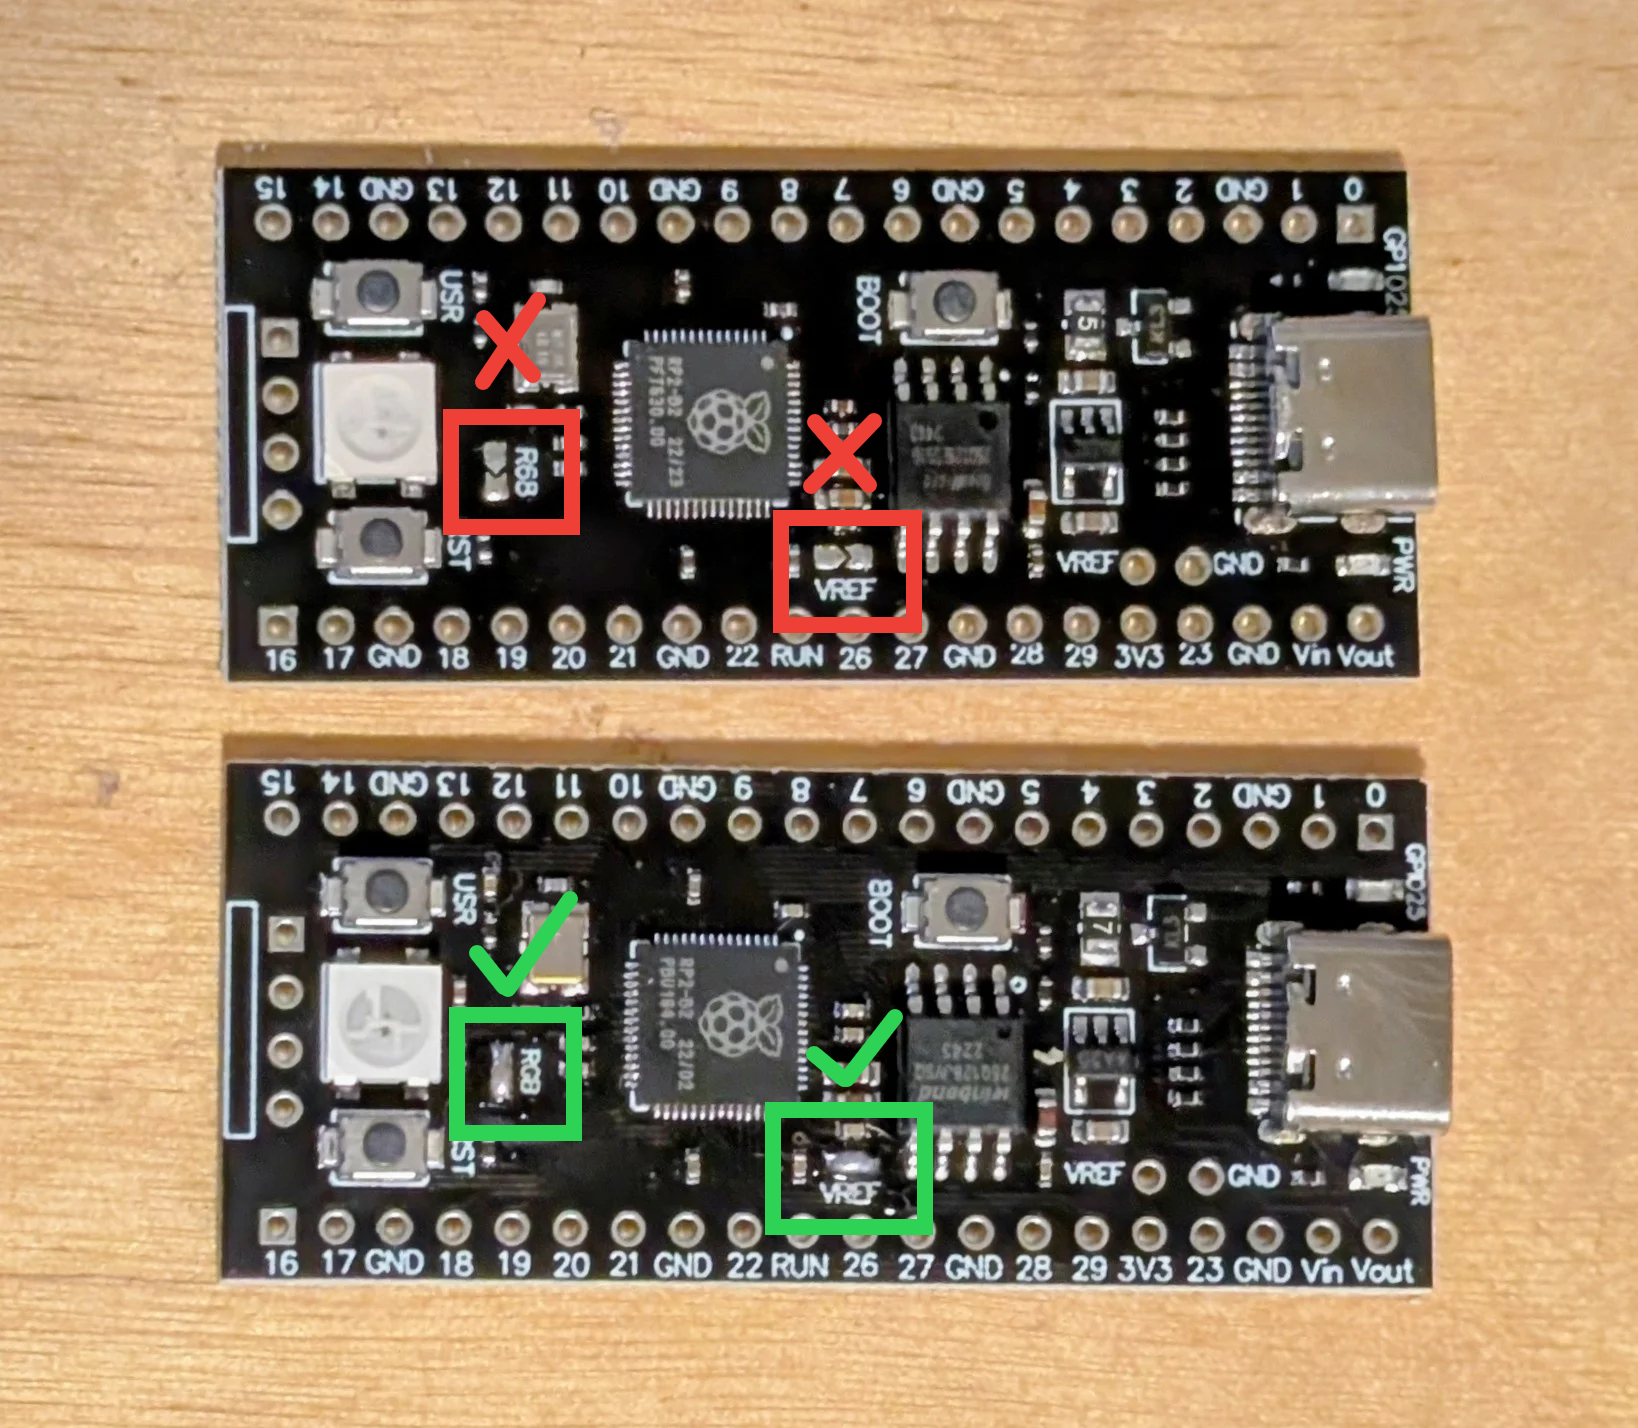
Check that the RGB and VREF pads are bridged. Some 16 MB modules arrive without these connections and require solder bridges.
If the problem remains, email zack@infinitedigits.co.
Legacy v1 firmware and sample uploader
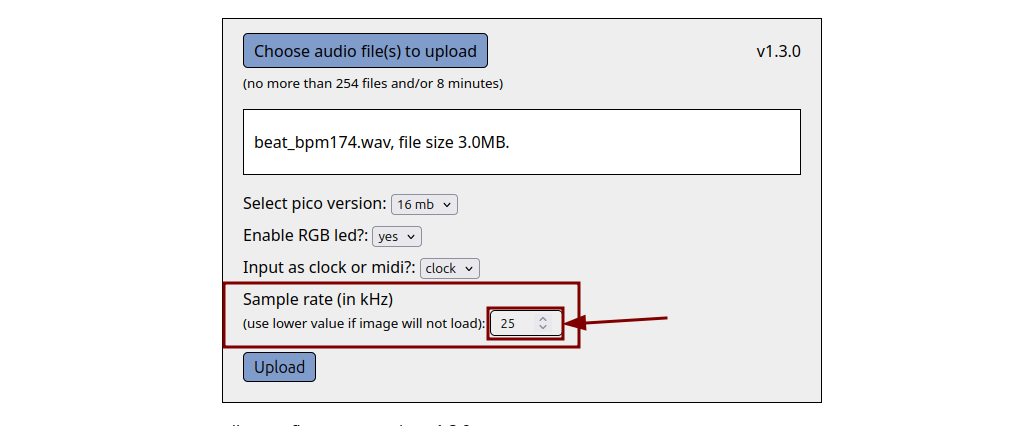
These files are retained for original v1 Pikocore hardware. Current v2 devices should use the Pikocore Loader. The v1 sample uploader remains at api.pikocore.com.
Put bpmX in an audio filename to provide its tempo, such as
my_drum_bpm150.wav. Add beatsY, such as
my_drum_bpm150_beats4.wav, to provide its beat count.
- July 20, 2025 · v1.4.0Release note only; improved stability.
- March 28, 2024 · v1.3.0Release note only; added MIDI out.
- February 2, 2024 · v1.2.2Download MIDI build UF2Download clock build UF2
- December 2, 2023 · v1.1.0Download MIDI build ZIP
- September 6, 2023 · v1.0.1Download clock/no-RGB build ZIP
- July 4, 2023 · v1.0.1Download clock build ZIP
UF2 troubleshooting
If a v1 UF2 will not load, the RP2040 may not tolerate the firmware’s overclock. Select a lower sample rate in the v1 uploader and build the firmware again.