
Software guide
Getting started with _core sample manager
A native sample manager for macOS, Windows, and Linux. Prepare Zeptocore, EZEPTOCORE, and Ectocore SD cards completely offline, with no web version needed. Start here for samples, slices, optional tempo changes, and firmware installation.
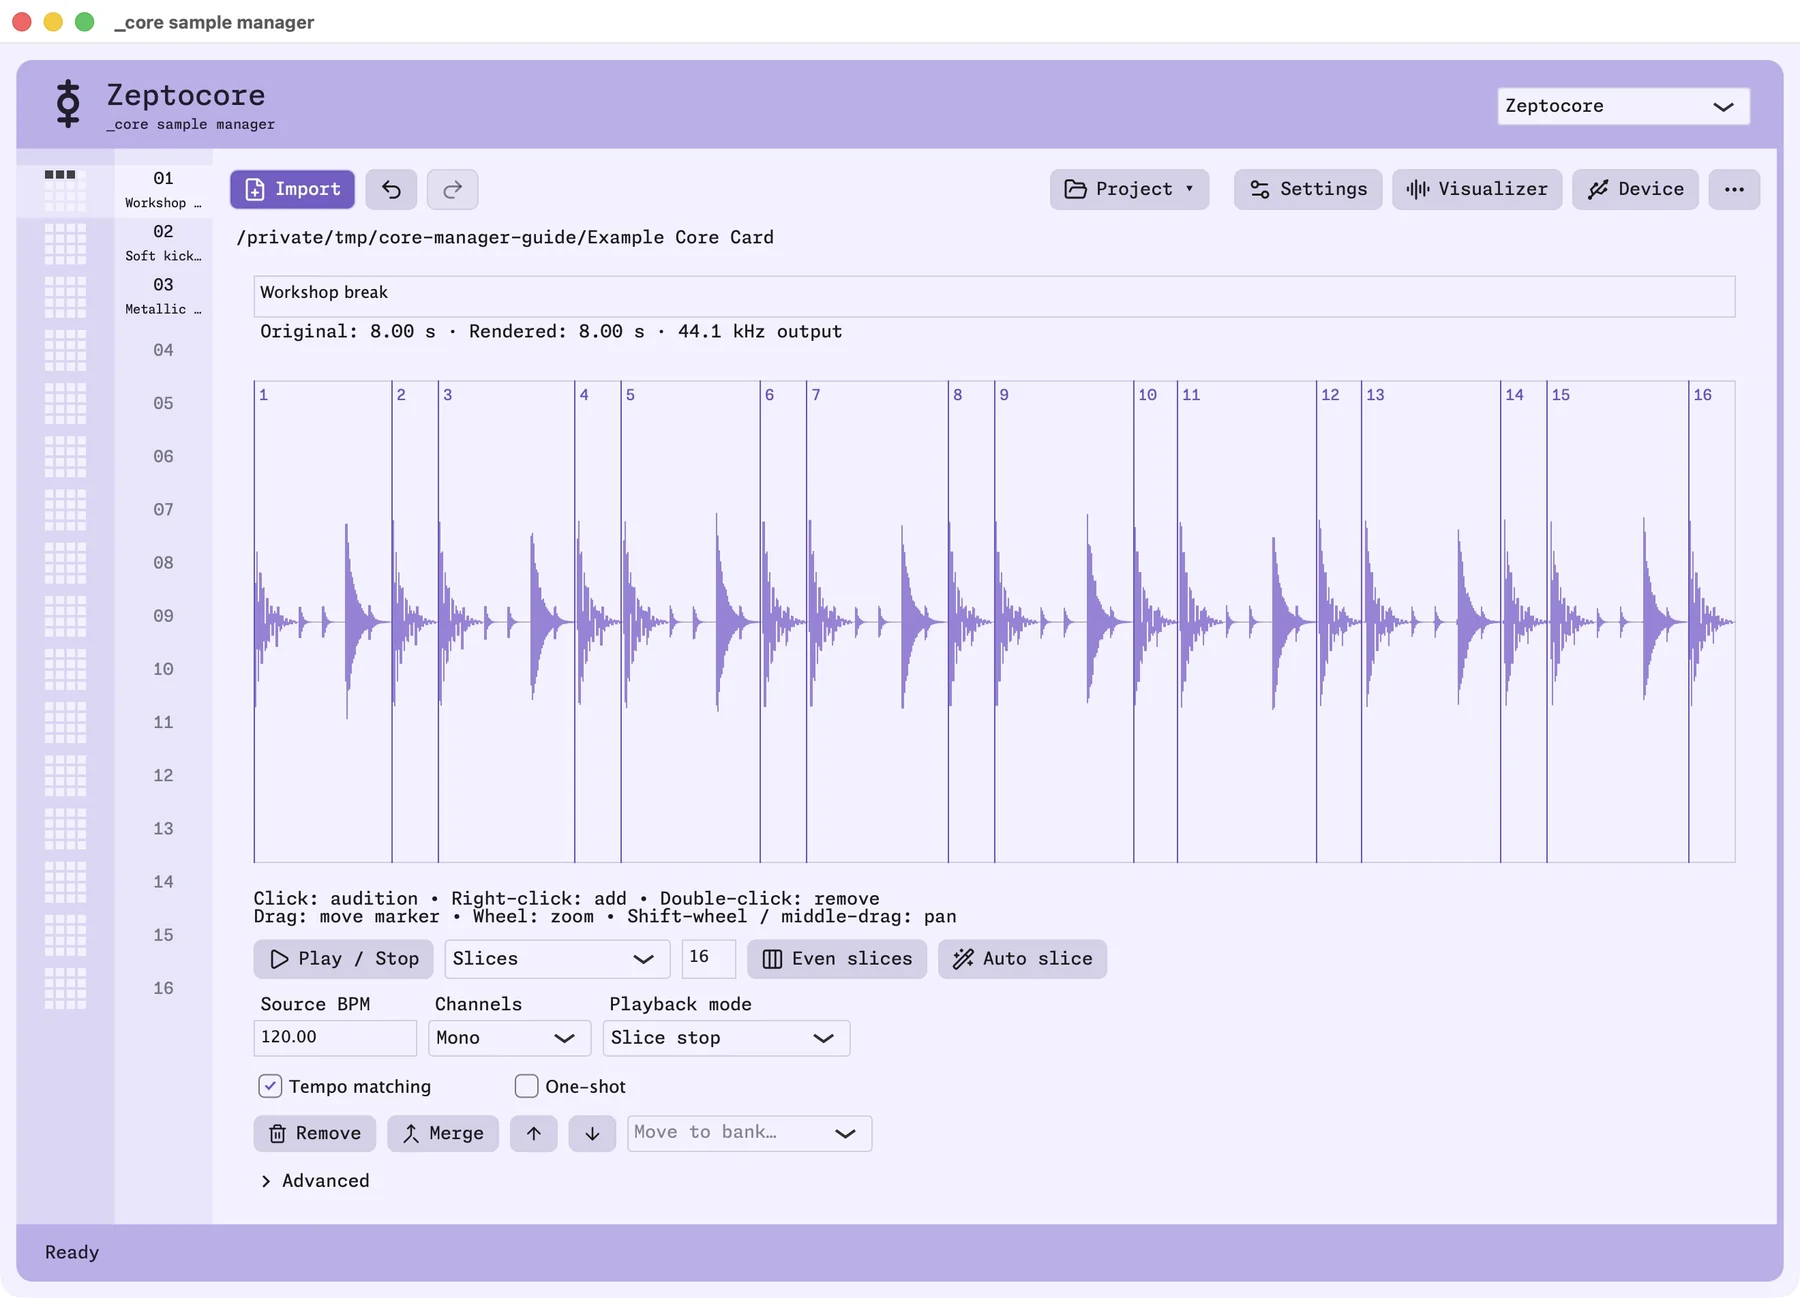
The new _core sample manager is now a native desktop app that can prepare samples for Zeptocore, EZEPTOCORE, and Ectocore. It runs on macOS, Windows, and Linux, and you can use it completely offline to import sounds, organize banks, edit slices, and save your instrument's settings.
You no longer need the browser manager, but they remain available if you prefer them: Zeptocore, EZEPTOCORE, and Ectocore. The files downloaded from the browser managers are also fully compatible with this new native tool
This guide follows desktop app v8.1.0 on macOS, using a small example project called Example Core Card. That folder is on the computer; choosing your mounted SD card uses the same workflow. Most screenshots show earlier 8.0 builds; the default-samples screenshot shows v8.1.0. Click any walkthrough image to open it at full resolution.
Open your SD card directly in the app to edit its samples and settings. The app saves changes to the card automatically, with no separate export step. Once you have downloaded the app, sample preparation stays on your computer; fetching firmware or default sample collections for the first time and the optional online drum analysis need an internet connection.
download the app
Download v8.1.0 for your system from the _core release page:
| Computer | Download |
|---|---|
| Mac with Apple Silicon: M1, M2, M3, M4, and later | macOS Apple Silicon ZIP, v8.1.0 |
| Mac with an Intel processor | macOS Intel ZIP, v8.1.0 |
| Windows, x64 | Windows ZIP, v8.1.0 |
| Linux, x86_64 | Linux tar.gz, v8.1.0 |
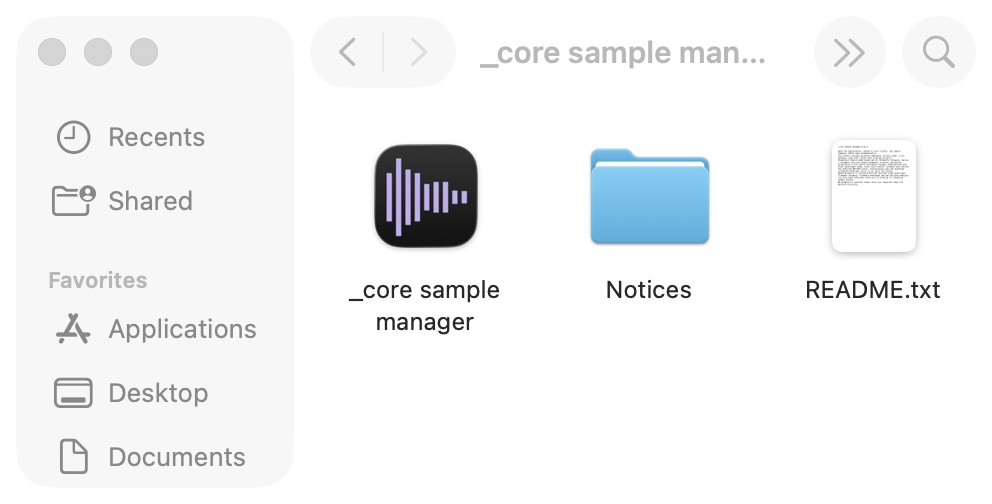
On a Mac, unzip the download, open the extracted folder, and open _core sample manager.app. You can move the app to Applications if you want to keep it there. Both Mac builds require macOS 11 or newer. Use About This Mac if you are unsure which processor you have.
On Windows, extract the ZIP before opening the application inside it. On Linux, extract the tar.gz, keep the files together, and launch core-sample-manager. You do not need to build the source, install Python, or start a web server to use these downloads.
open the SD card
Back up a card before your first editing session. Then:
- Remove the SD card from the Zeptocore/ectocore/EZEPTOCORE. Then put the card in a reader connected to your computer.
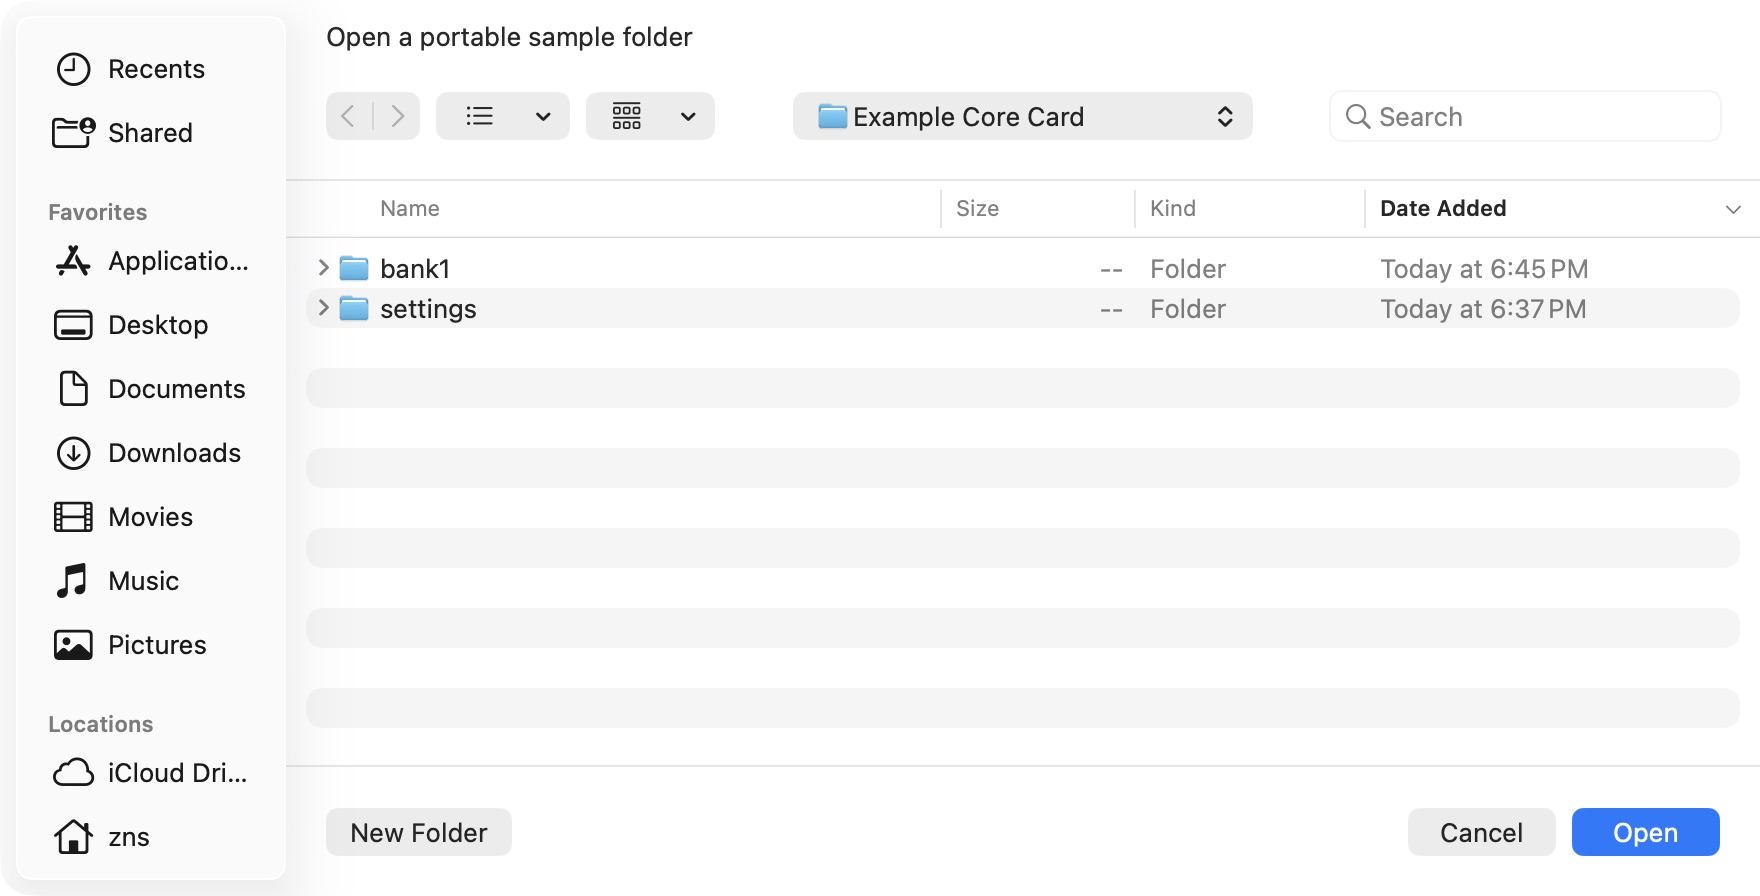
- In the app, choose Open a project folder, or Project → Open folder….
- Select the root of the SD card: the location containing
bank1,bank2, and the other bank folders. Do not select one individual bank. - Let the folder finish opening. Existing samples and settings appear in the editor.
- That's it! You can now edit and update settings directly on the SD Card!
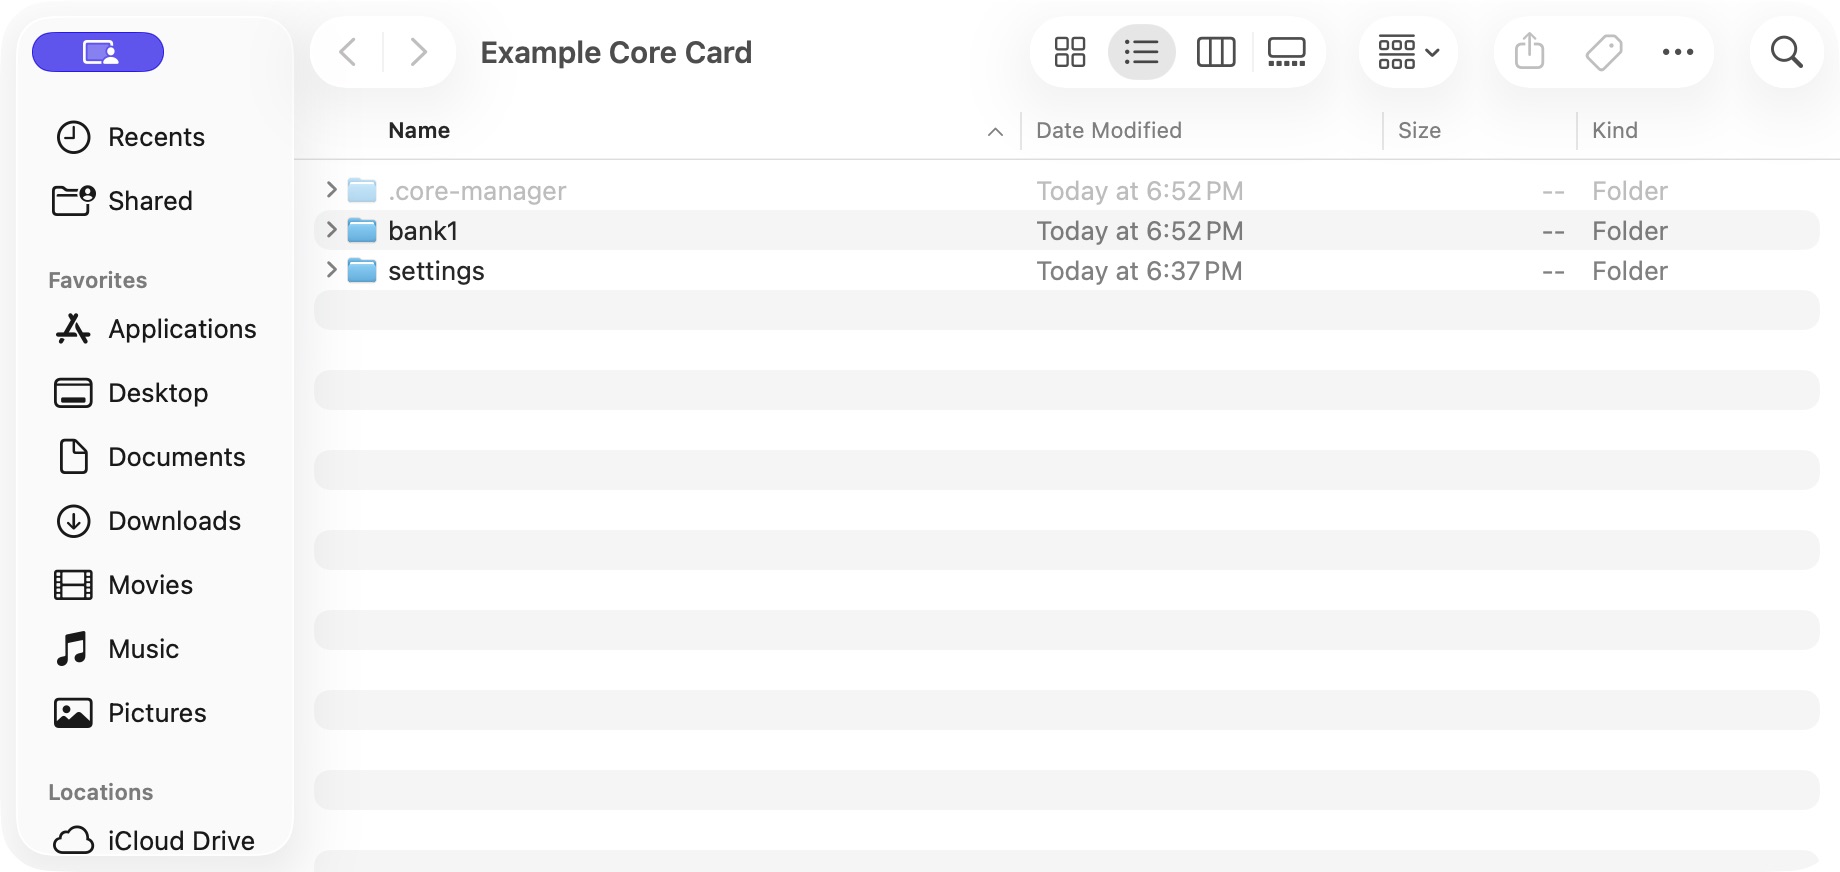
You can also work on a folder on your computer and later transfer it to an SD Card. To work in a folder on your computer, use Project → Create project… and choose a new folder name and location. You can also open an empty folder. The app creates the project files and initial settings there. Project → Duplicate project… makes a complete copy of the project.
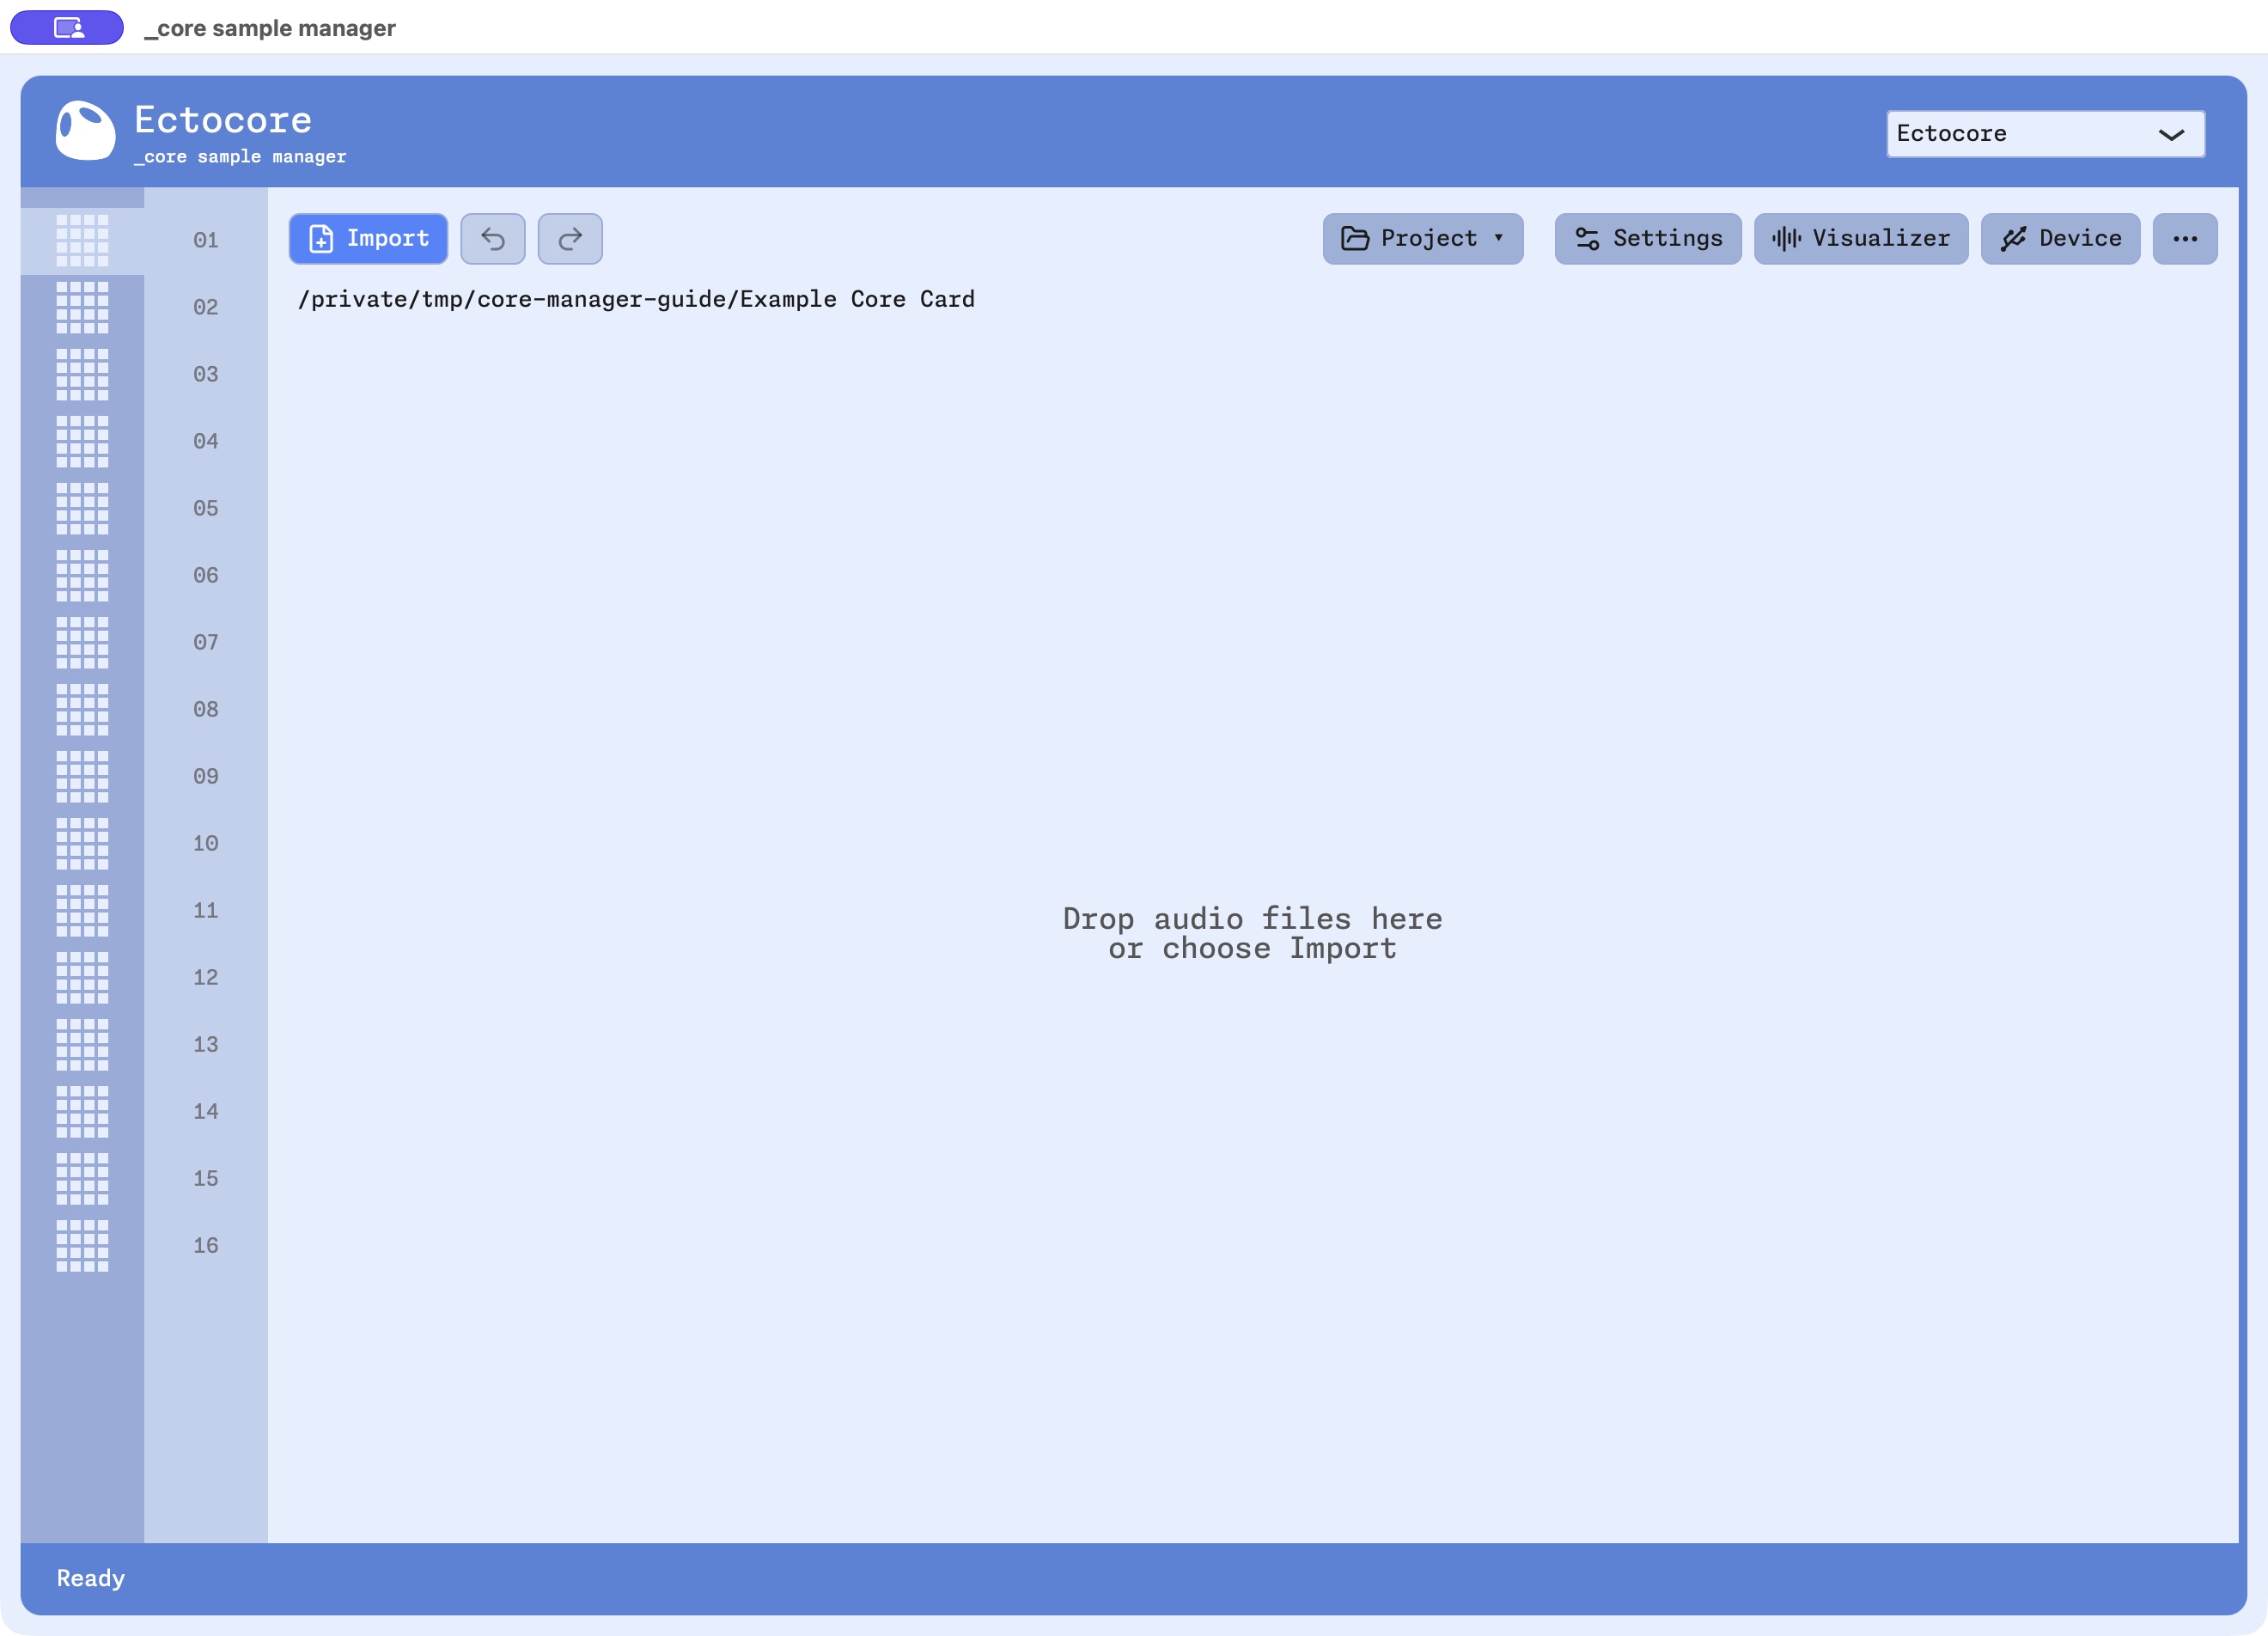
The selected folder holds both the hardware files and the editable project. A hidden folder called .core-manager keeps the project information and imported originals. Keep it when moving or backing up your project. On a Mac, Command–Shift–period shows hidden files in Finder.
get the default samples
Click Default samples… on the empty project screen, or choose Project → Default samples, then pick Ezeptocore or Ectocore. The app downloads the banks and opens a new editable project in Downloads.
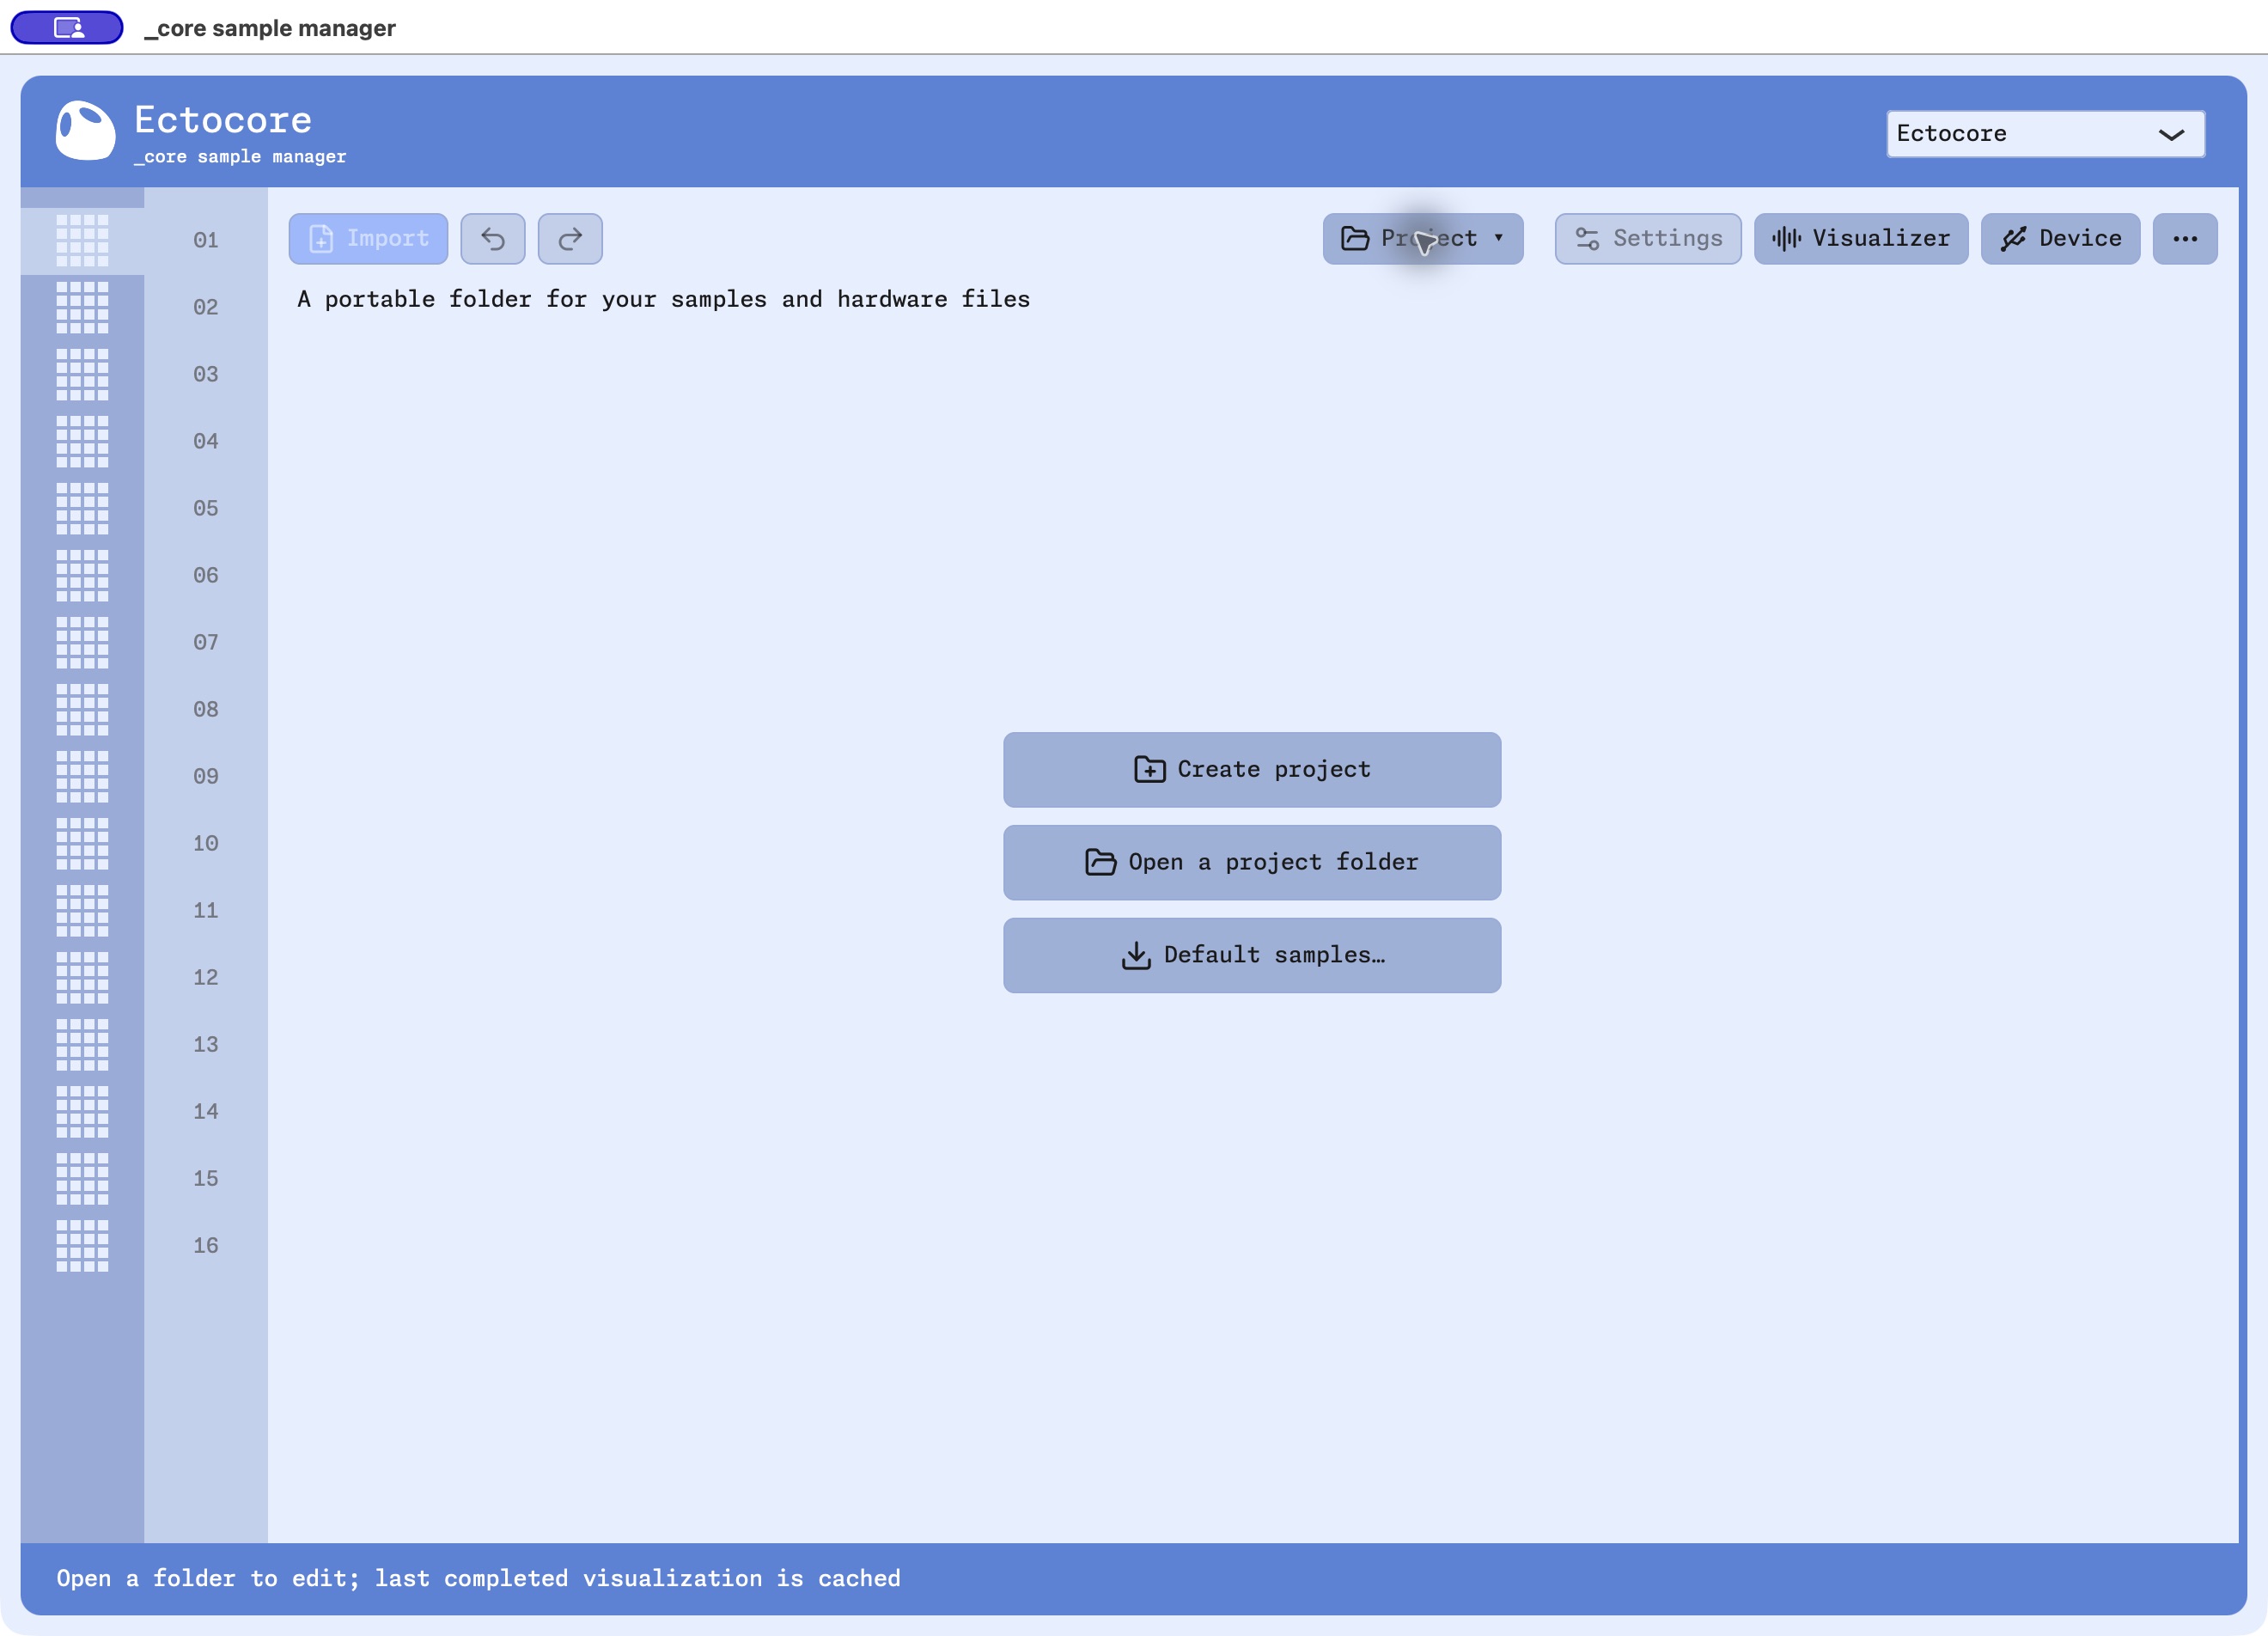
Wait for Ready before copying the project to an SD card or loading it in VCV Rack. Use v8.1.0 firmware on hardware. The first download needs internet; cached collections work offline.
one app for all the _core objects
Use the selector in the upper-right corner to choose Zeptocore, Ezeptocore, or Ectocore. It changes the appearance and the controls shown for that instrument. Your sample edits remain in the same project. It also selects the matching hardware in the firmware window; still check that selection before downloading.
Zeptocore shows a One-shot option. EZEPTOCORE and Ectocore show the Kick, Snare, and Other transient lanes used by their trigger features. Switching presentations preserves those settings, including values that are temporarily hidden.
import samples
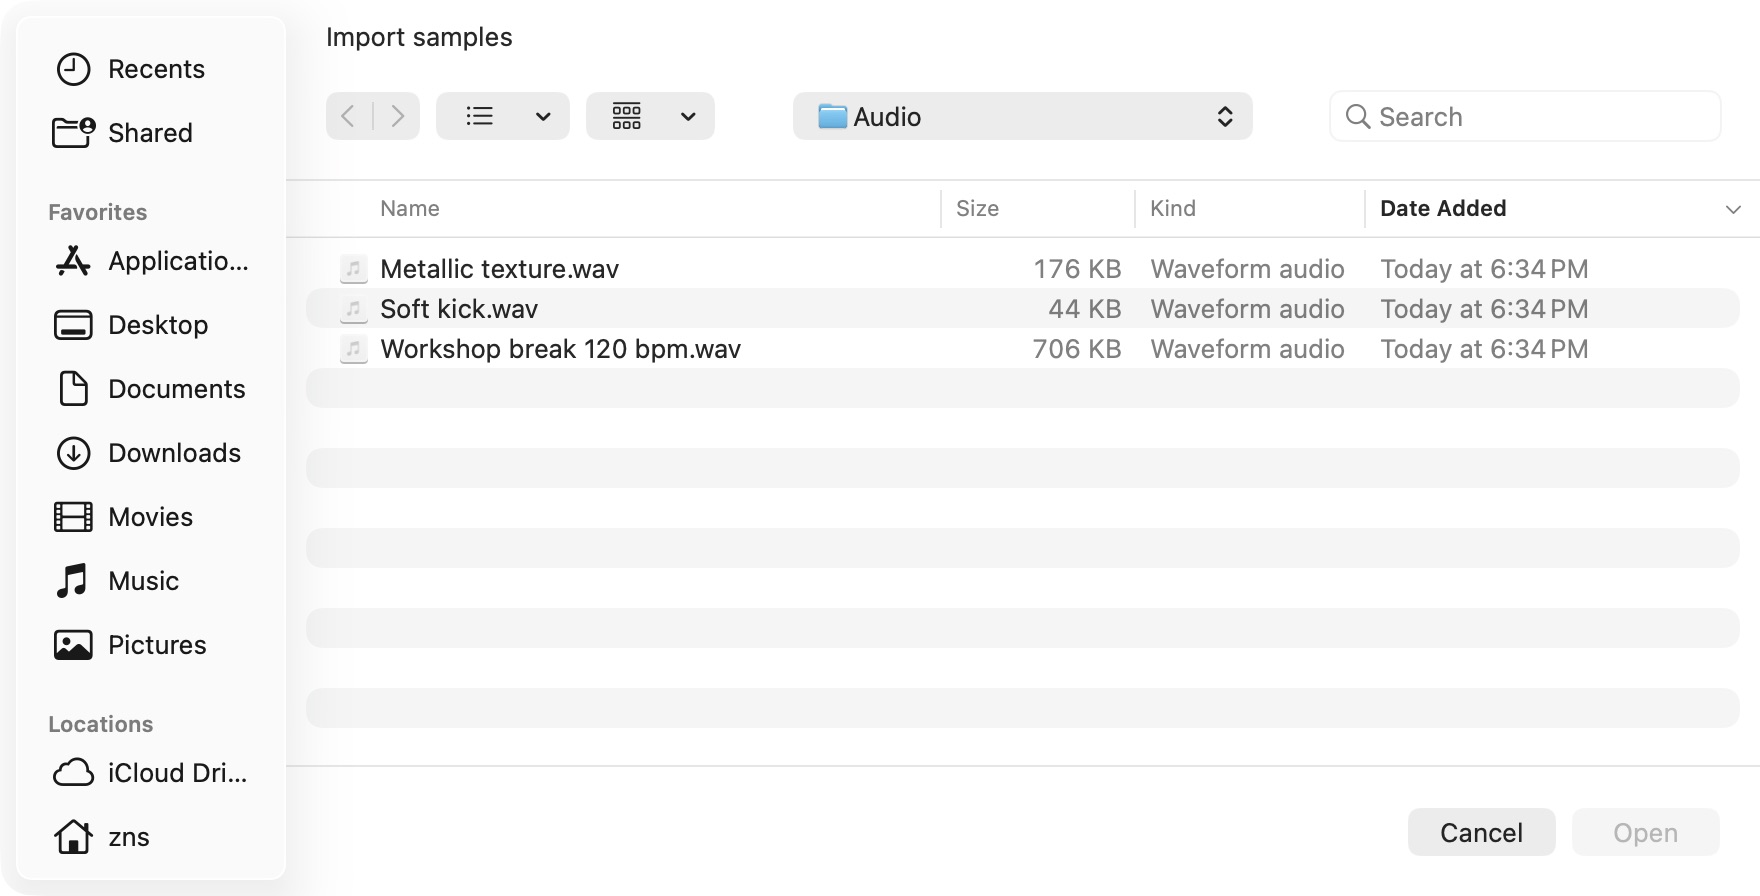
The two columns on the left are banks and sample slots. There are 16 banks, each holding up to 16 samples. Pick a bank, then click Import or drop audio files into the window. WAV, AIFF/AIF, FLAC, MP3, Ogg, and Renoise XRNI files are supported.
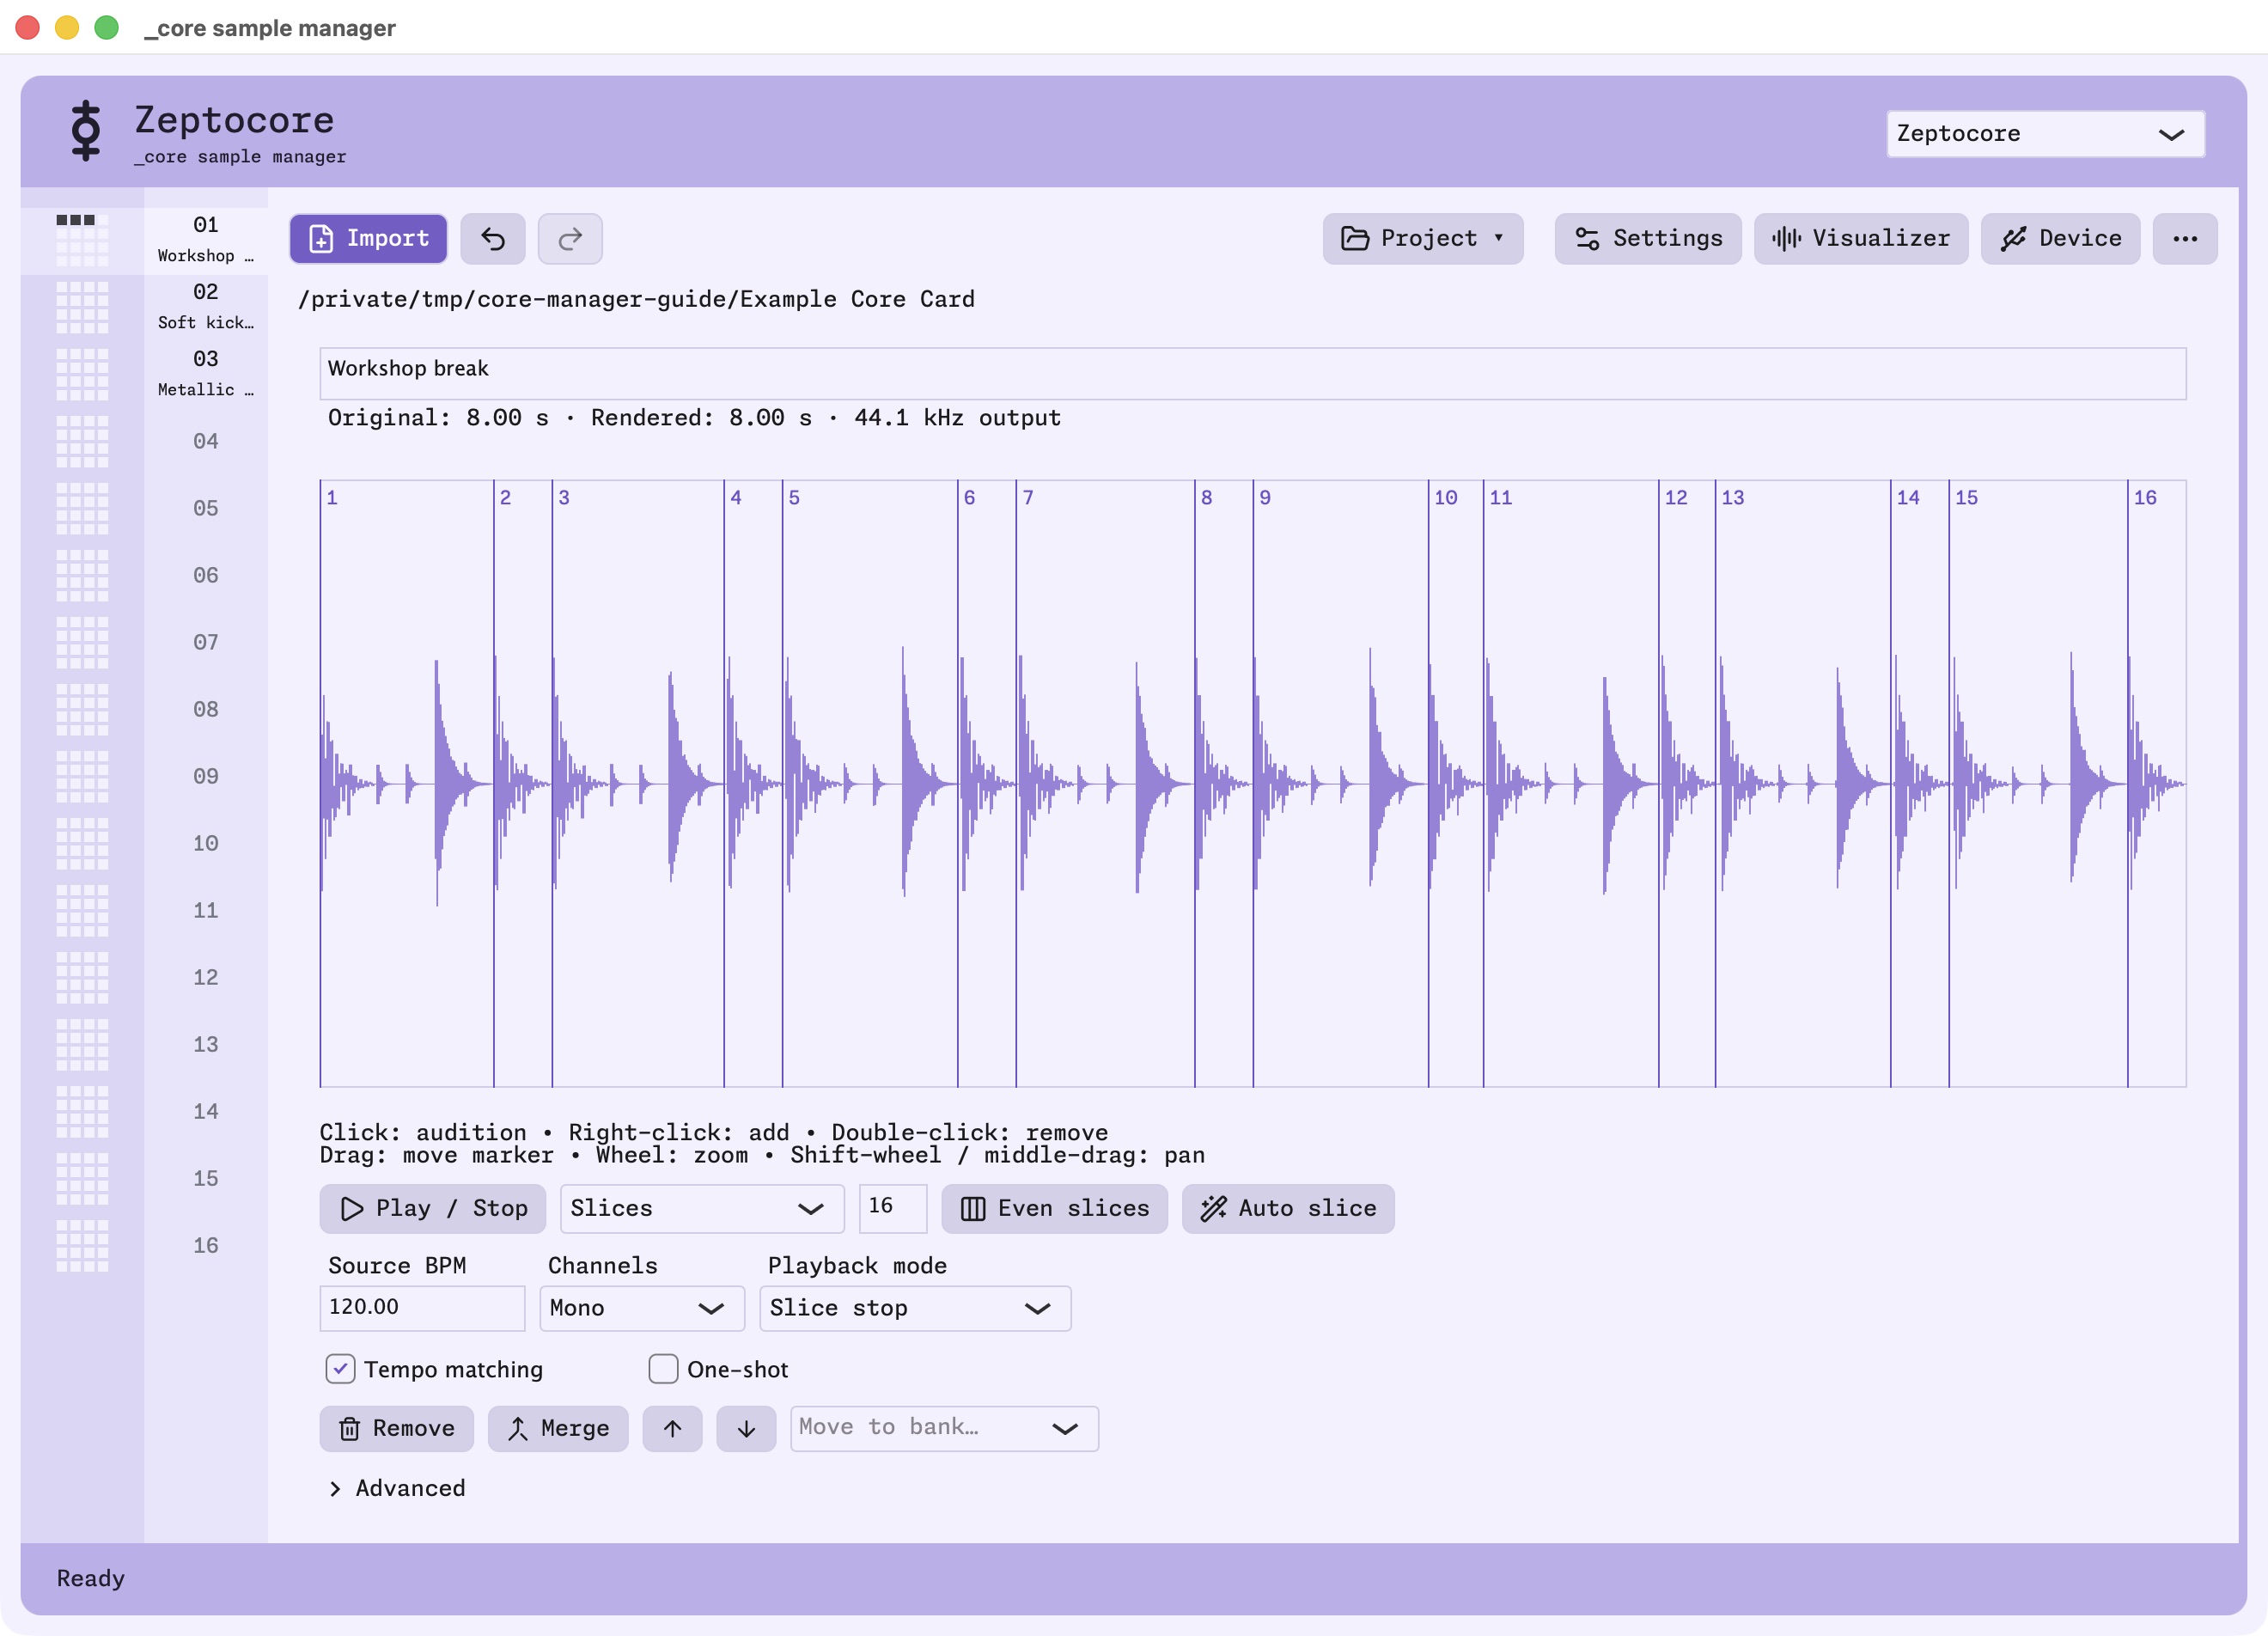
The first imported sample is selected automatically. Click Play to hear the whole sample, or click a slice in the waveform to hear that part. The example here is an eight-second drum loop at 120 BPM. The app prepares the hardware audio for you; you do not have to pre-convert your recordings to the device's WAV format.
Current exports contain primary audio without stretched companion files. Install v8.1.0 firmware before using newly prepared cards; primary-only exports require v8.0.5 or later, which supplies live granular Time Stretch. Existing companion files on older cards are preserved and ignored by current firmware.
Rename a sound in its name field and press Enter. Use the sample actions to move it up or down, or choose Move to bank…. Command/Ctrl-click selects several samples; Shift-click selects a range. Merge makes a new sample from the selected entries in their list order and leaves the originals available. Remove removes selected entries from this project. Undo reverses these edits.
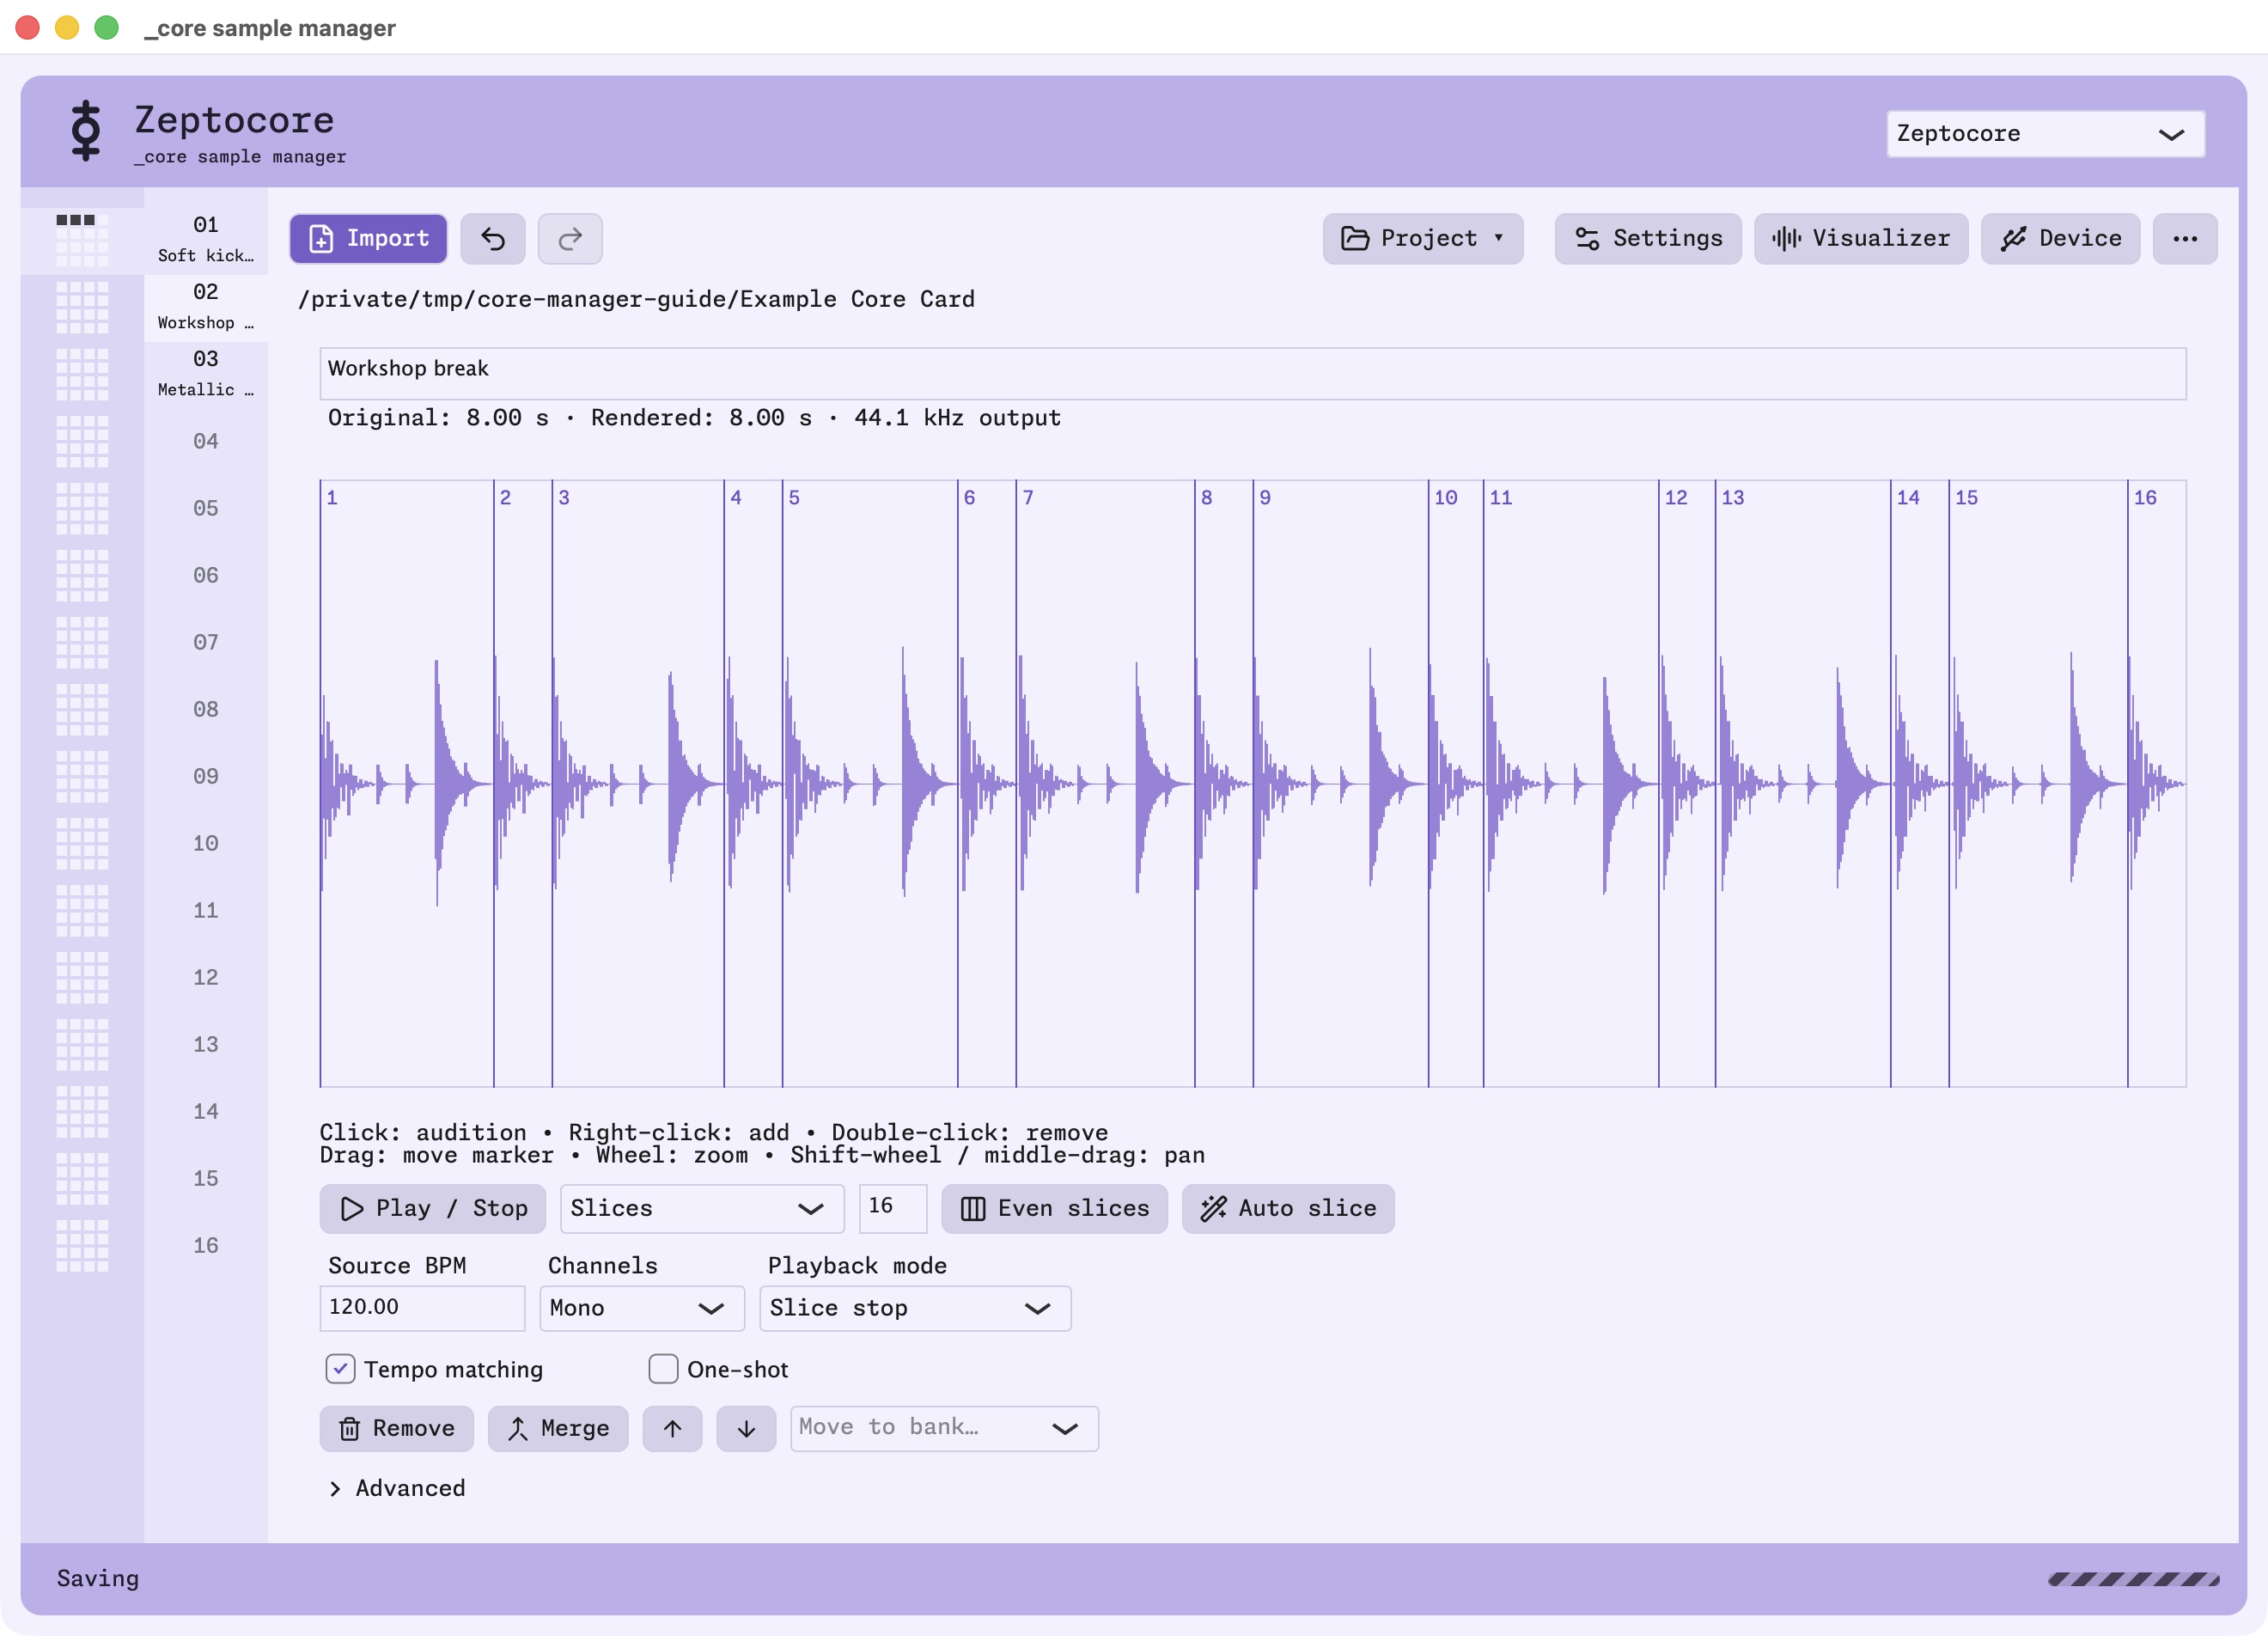
Importing into a full bank does not continue automatically in the next bank. Choose another bank or make space before importing more files.
edit slices
The slice-count field, Even slices, and Auto slice sit below the waveform. Start with 16 slices so the result is easy to hear and compare.
Even slices divides the sample into equal sections. Use it for loops with evenly spaced hits. New files without embedded slice markers normally start with 16 even slices.
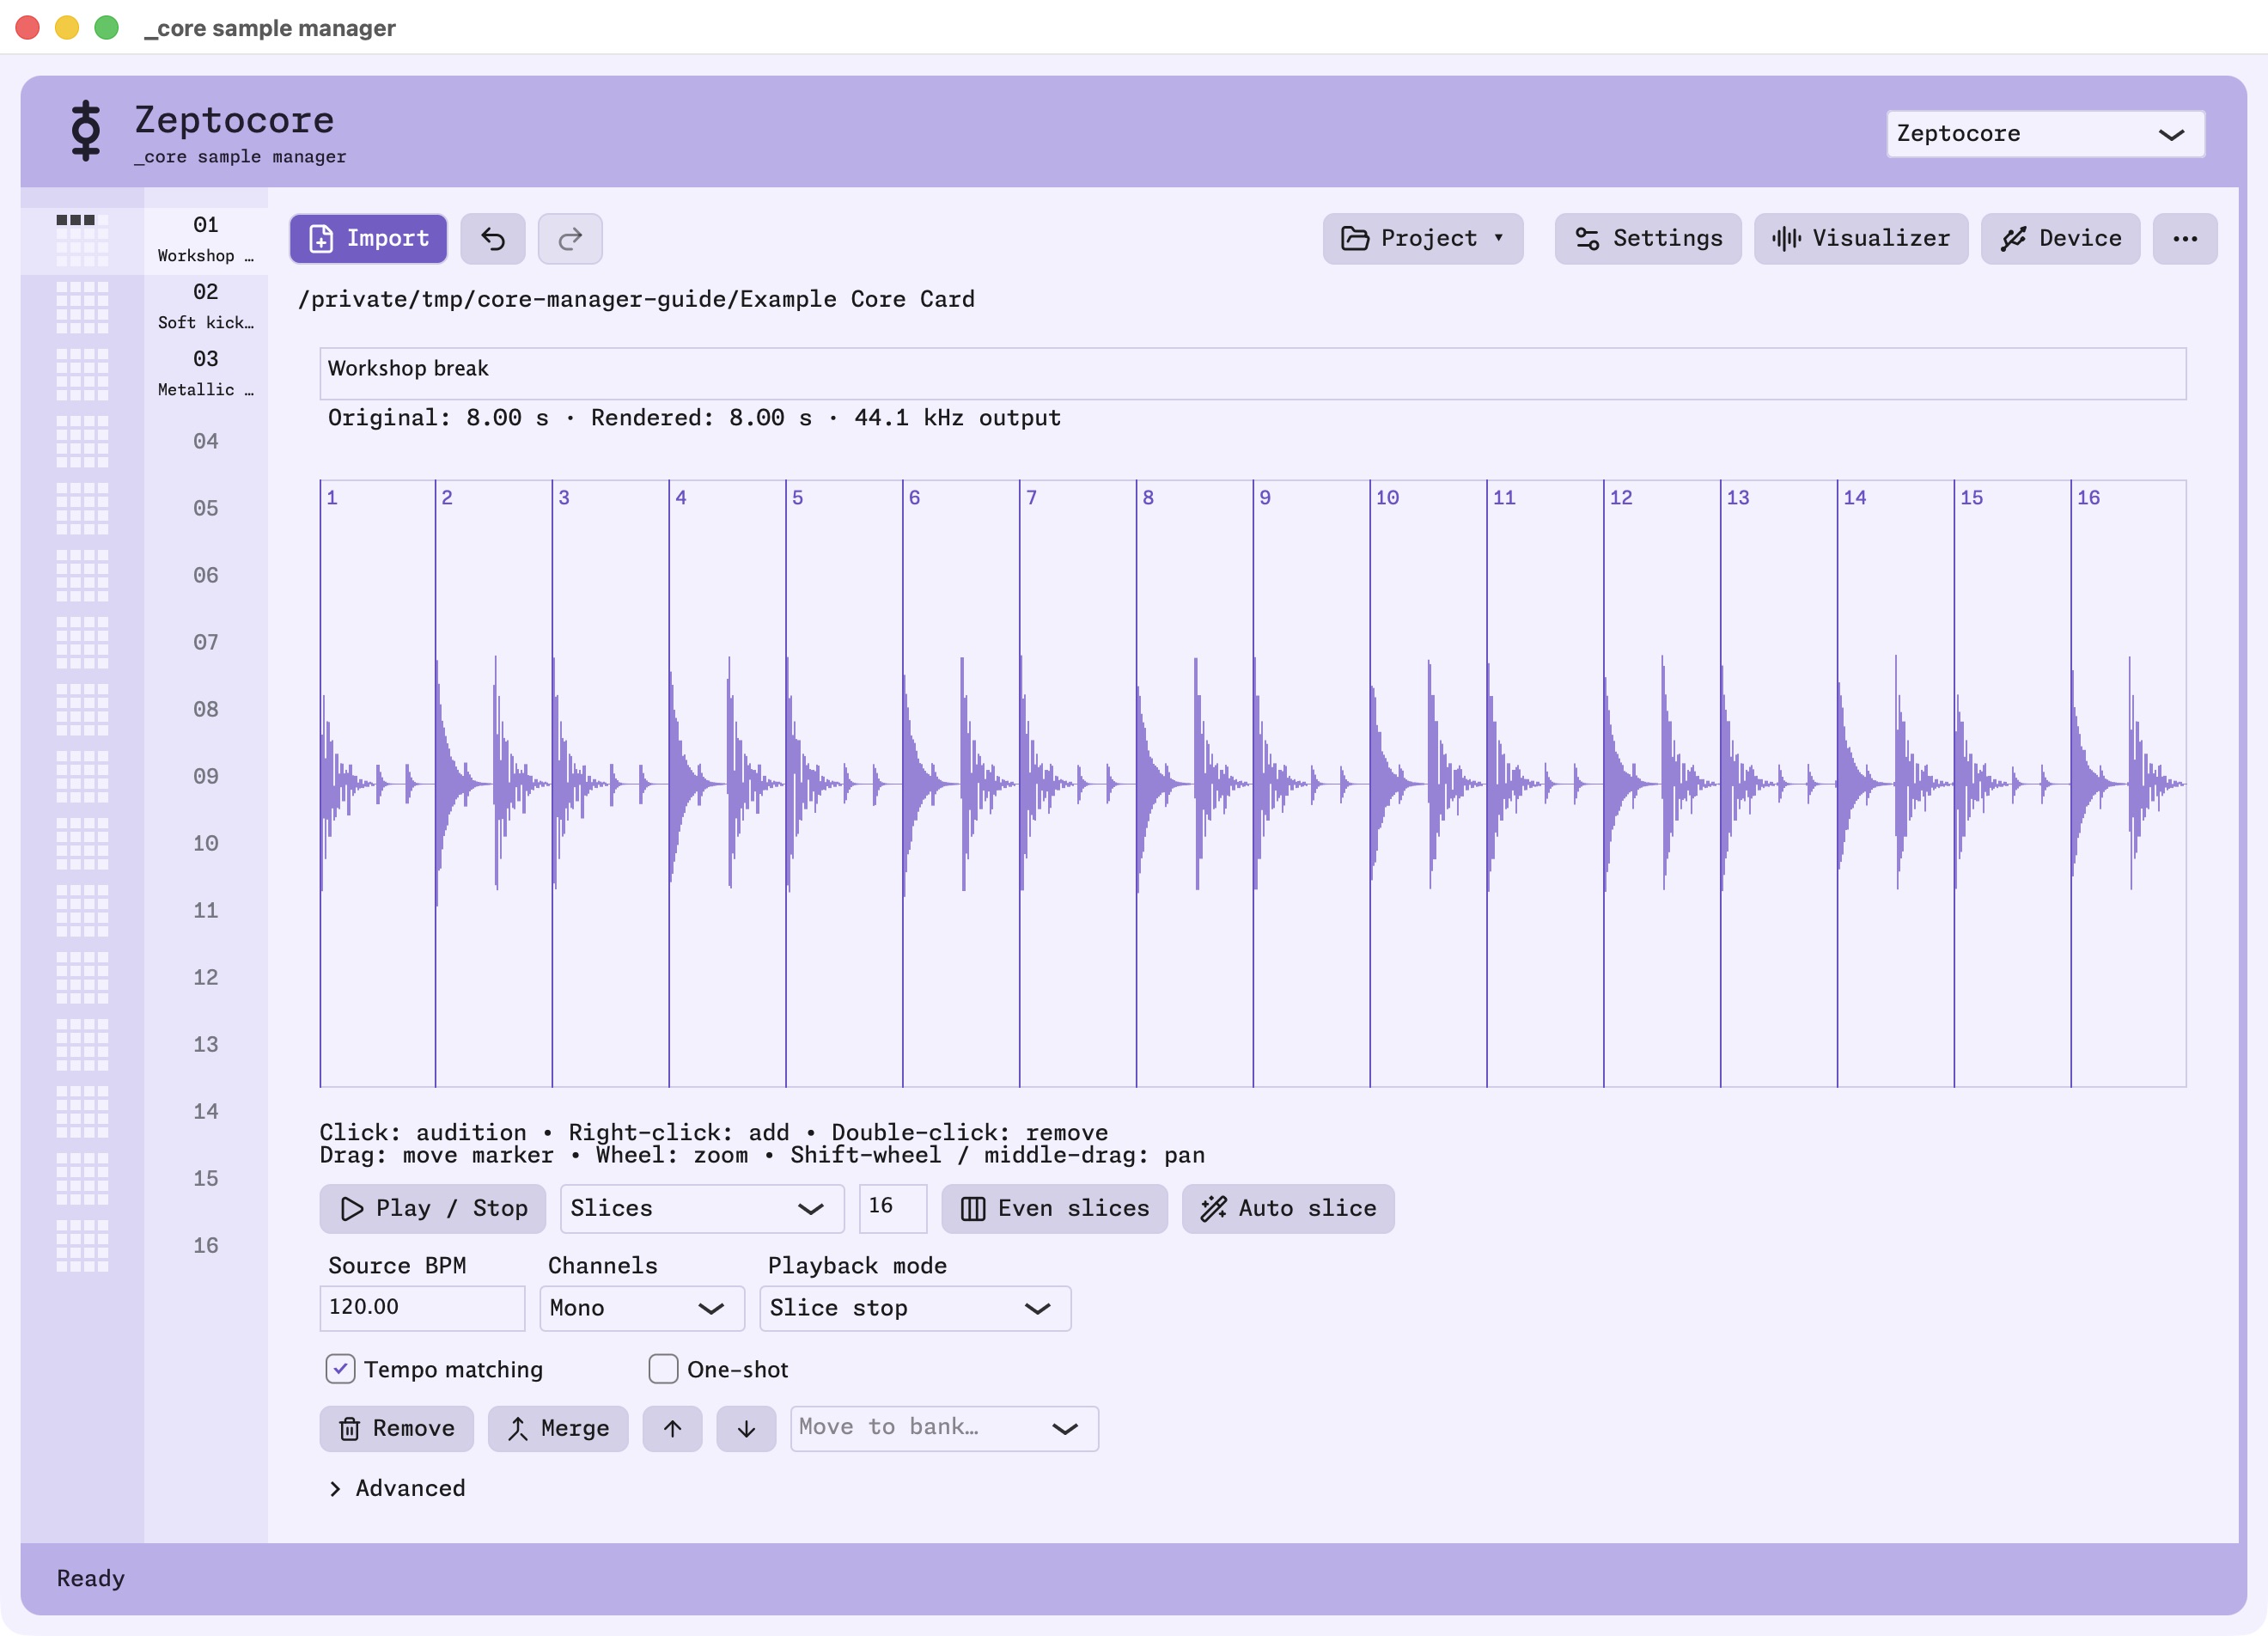
Auto slice looks for attacks in the audio. The count is a target, so a sparse recording may produce fewer cuts. Listen to the slices and adjust any boundaries that miss the start of a sound. In the advanced settings you can also change the algorithm used for auto slicing.
To adjust the boundaries yourself, right-click to add one, drag to move it, and double-click to remove it. Use the mouse wheel to zoom; Shift-wheel or a middle-button drag pans. Manual boundary edits and Auto slice enable Variable splice timing. Choosing Even slices returns to evenly spaced timing. Undo restores the associated markers and timing setting together.
For EZEPTOCORE or Ectocore, choose a Kick, Snare, or Other lane to work on transient markers. These are separate from the main slice boundaries. Advanced → Analyze drums online is optional: it uploads the selected source for analysis. Importing, ordinary editing, and Auto slice do not require that service.
managing tempo
The Source tempo is important - it will make sure the Zeptocore/ectocore/EZEPTOCORE keep the same tempo as your sample. Make sure the source tempo is set to the tempo of your sample.
Tempo matching is a separate setting for how the sample behaves on the instrument. If Tempo matching is enabled, then the sample will change to match the tempo on the instrument (changing pitch too, because it is a speed change). If you do not want it to follow the tempo (for example, if its one shot instruments), then uncheck this.
Optionally...if you'd like to render your sample at another tempo, use the advanced Render BPM option, which is optional. It is the tempo you want the app to stretch the sample to before saving it to the card. Leave it empty to keep the sample at its original tempo.
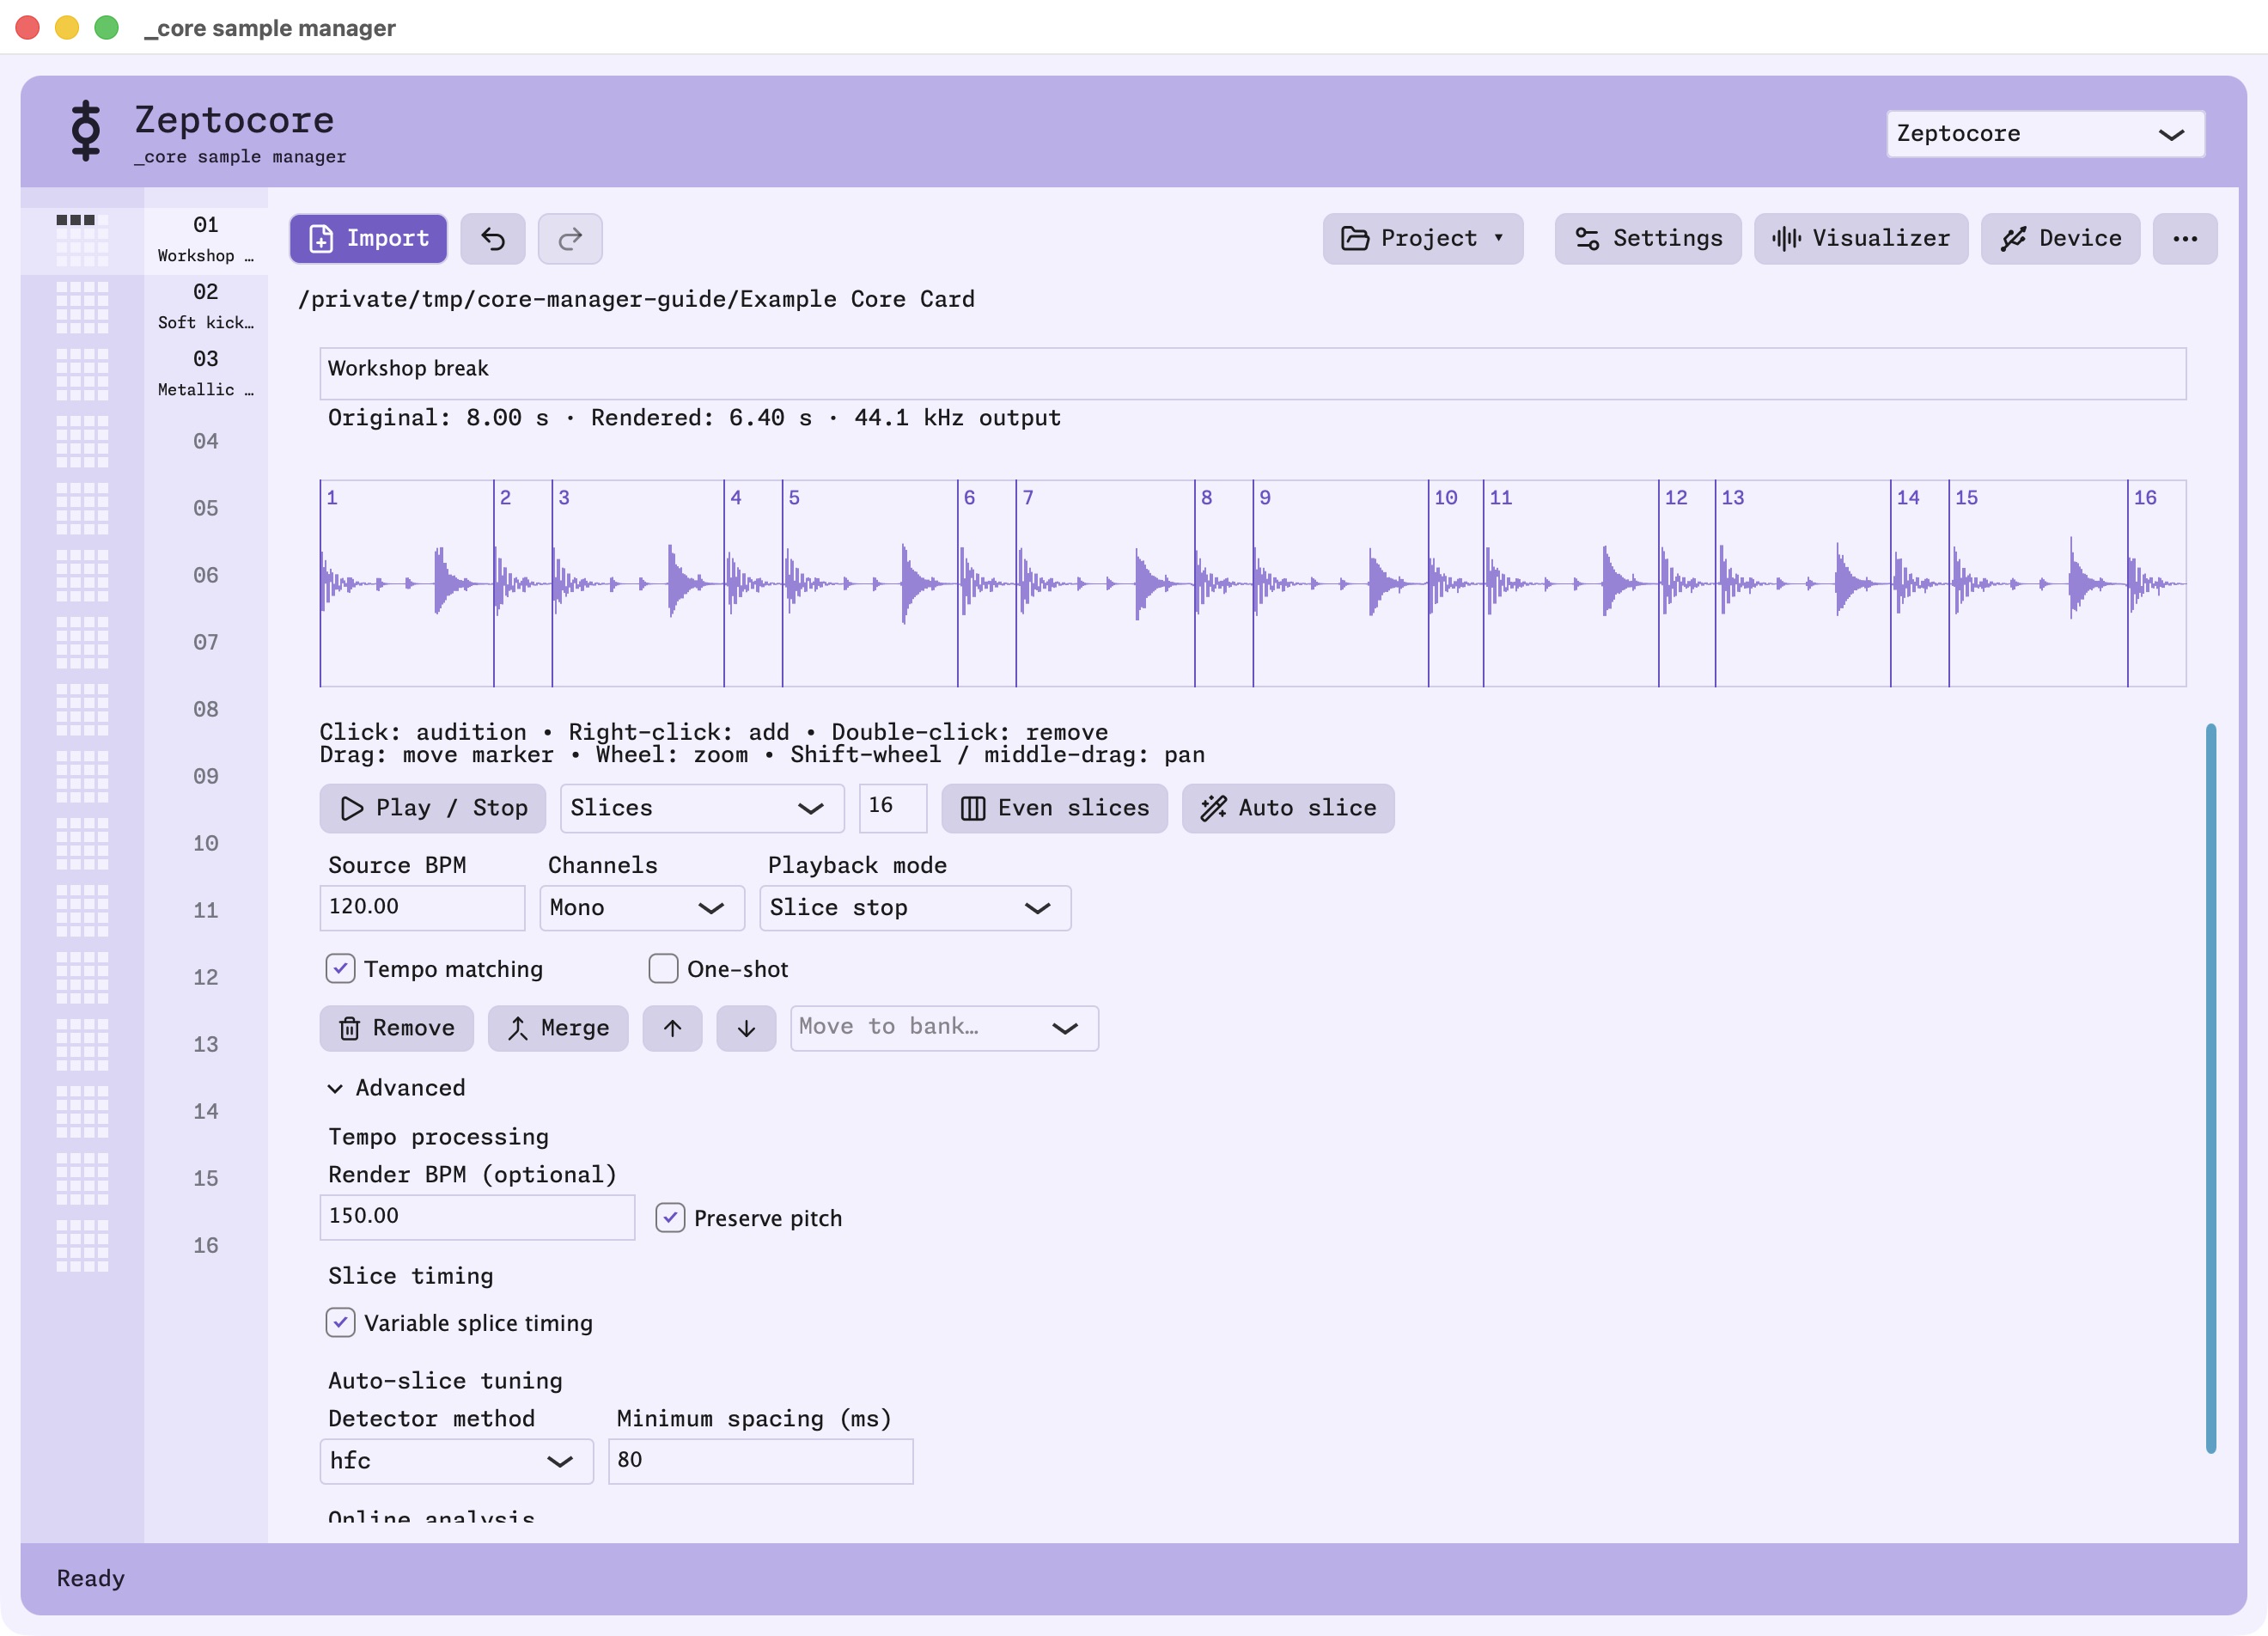
With Preserve pitch off, changing the render tempo also changes pitch. Turn it on to change the duration while retaining the original pitch. Each render starts from the imported original, so repeated tempo edits do not repeatedly process the last processed file.
save the settings
Click Settings to edit the project's hardware settings. These save into the selected folder along with the sample data. Existing card settings are retained when the card is opened.
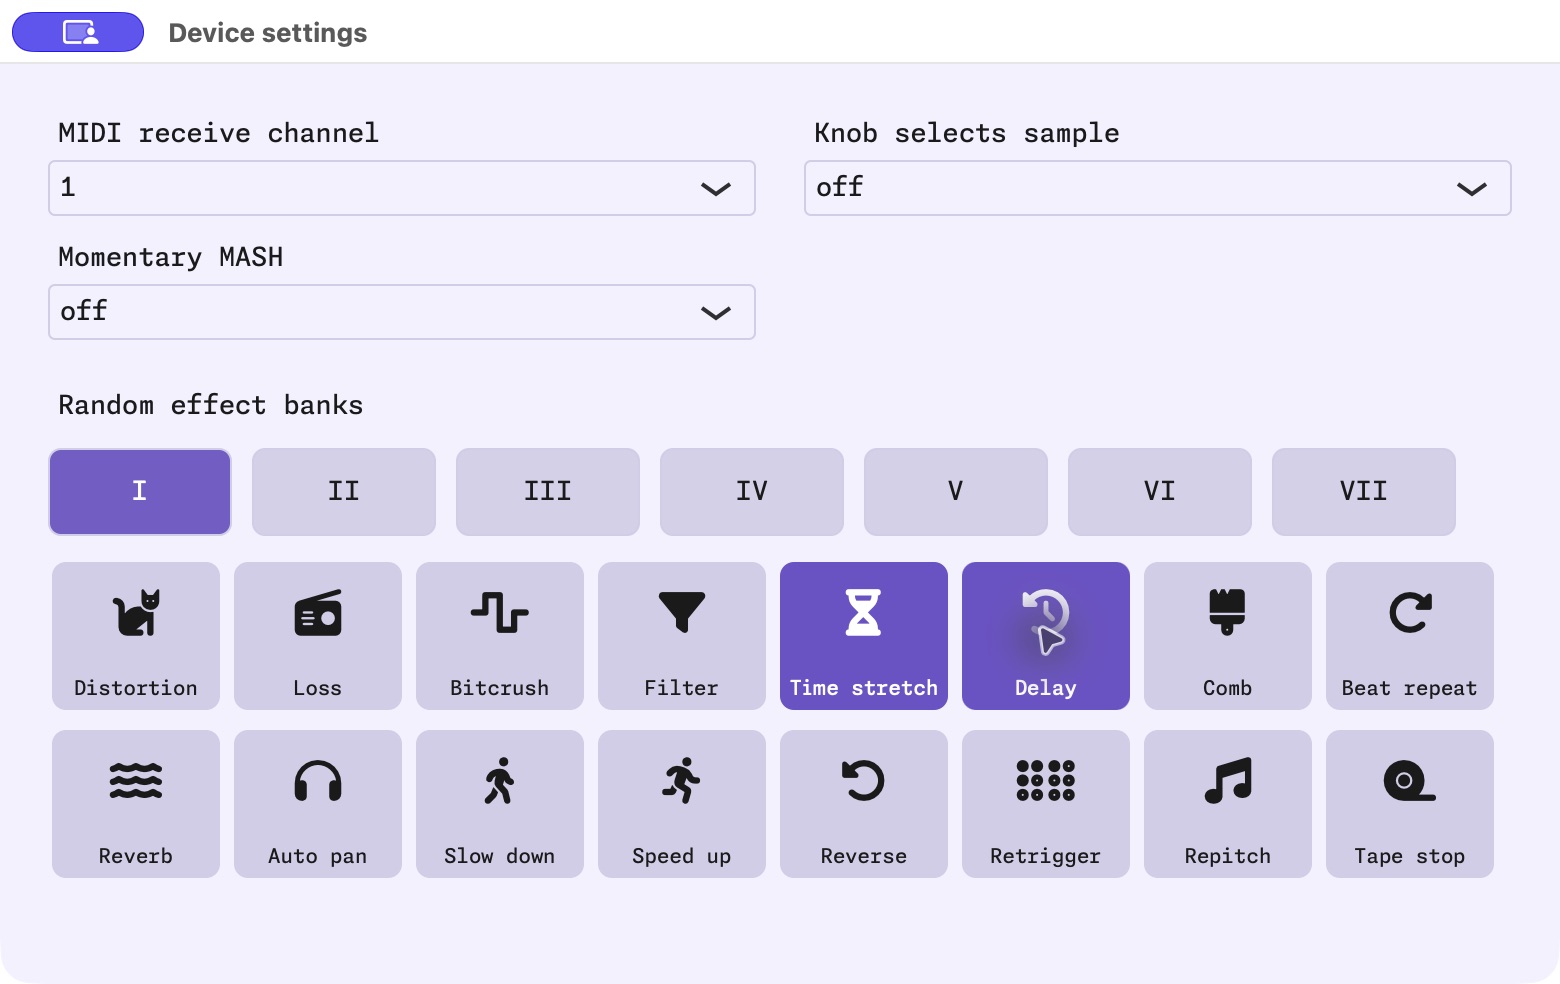
For Zeptocore, this includes the knob/MASH options and MIDI receive channel. The channel setting takes effect after restarting the device with that card and requires firmware that supports configurable channels.
For EZEPTOCORE, check clock behavior, CV settings, brightness, and the seven effect banks. Ectocore presents its effect choices as the Grimoire of Breaks. Start from your existing settings and change one thing at a time if you are still learning the instrument.
For EZEPTOCORE and Ectocore on v8.1.0, Startup playback defaults to Play immediately (default). Choose Wait for clock or button to power up with the sample loaded silently and clock and trigger outputs idle. Press TAP or send the first incoming clock pulse to start. Once started, the incoming-clock stop/continue setting controls what happens when the clock stops. Wait for Ready, eject the card, and restart the instrument with it inserted to apply the choice. Changing samples or banks does not reapply it, and Zeptocore keeps its existing startup behavior.
Start tempo is available in all three presentations. Leave it at Default (no override) to preserve the usual startup tempo, or choose Fixed BPM and enter a whole number from 30 to 300. Restart with the updated card to apply it. This sets the initial tempo; the instrument's normal tempo controls and external synchronization still work afterward.
For EZEPTOCORE and Ectocore, Sample CV mapping offers Bank divisions or 1 V/oct. Bank divisions spreads sample selection across the voltage range; 1 V/oct lets a note-based CV source select samples. It changes sample selection, not the pitch of the playing audio.
save and eject the SD card
Edits save automatically. The footer tells you what is happening: importing, processing audio, saving, or Ready.
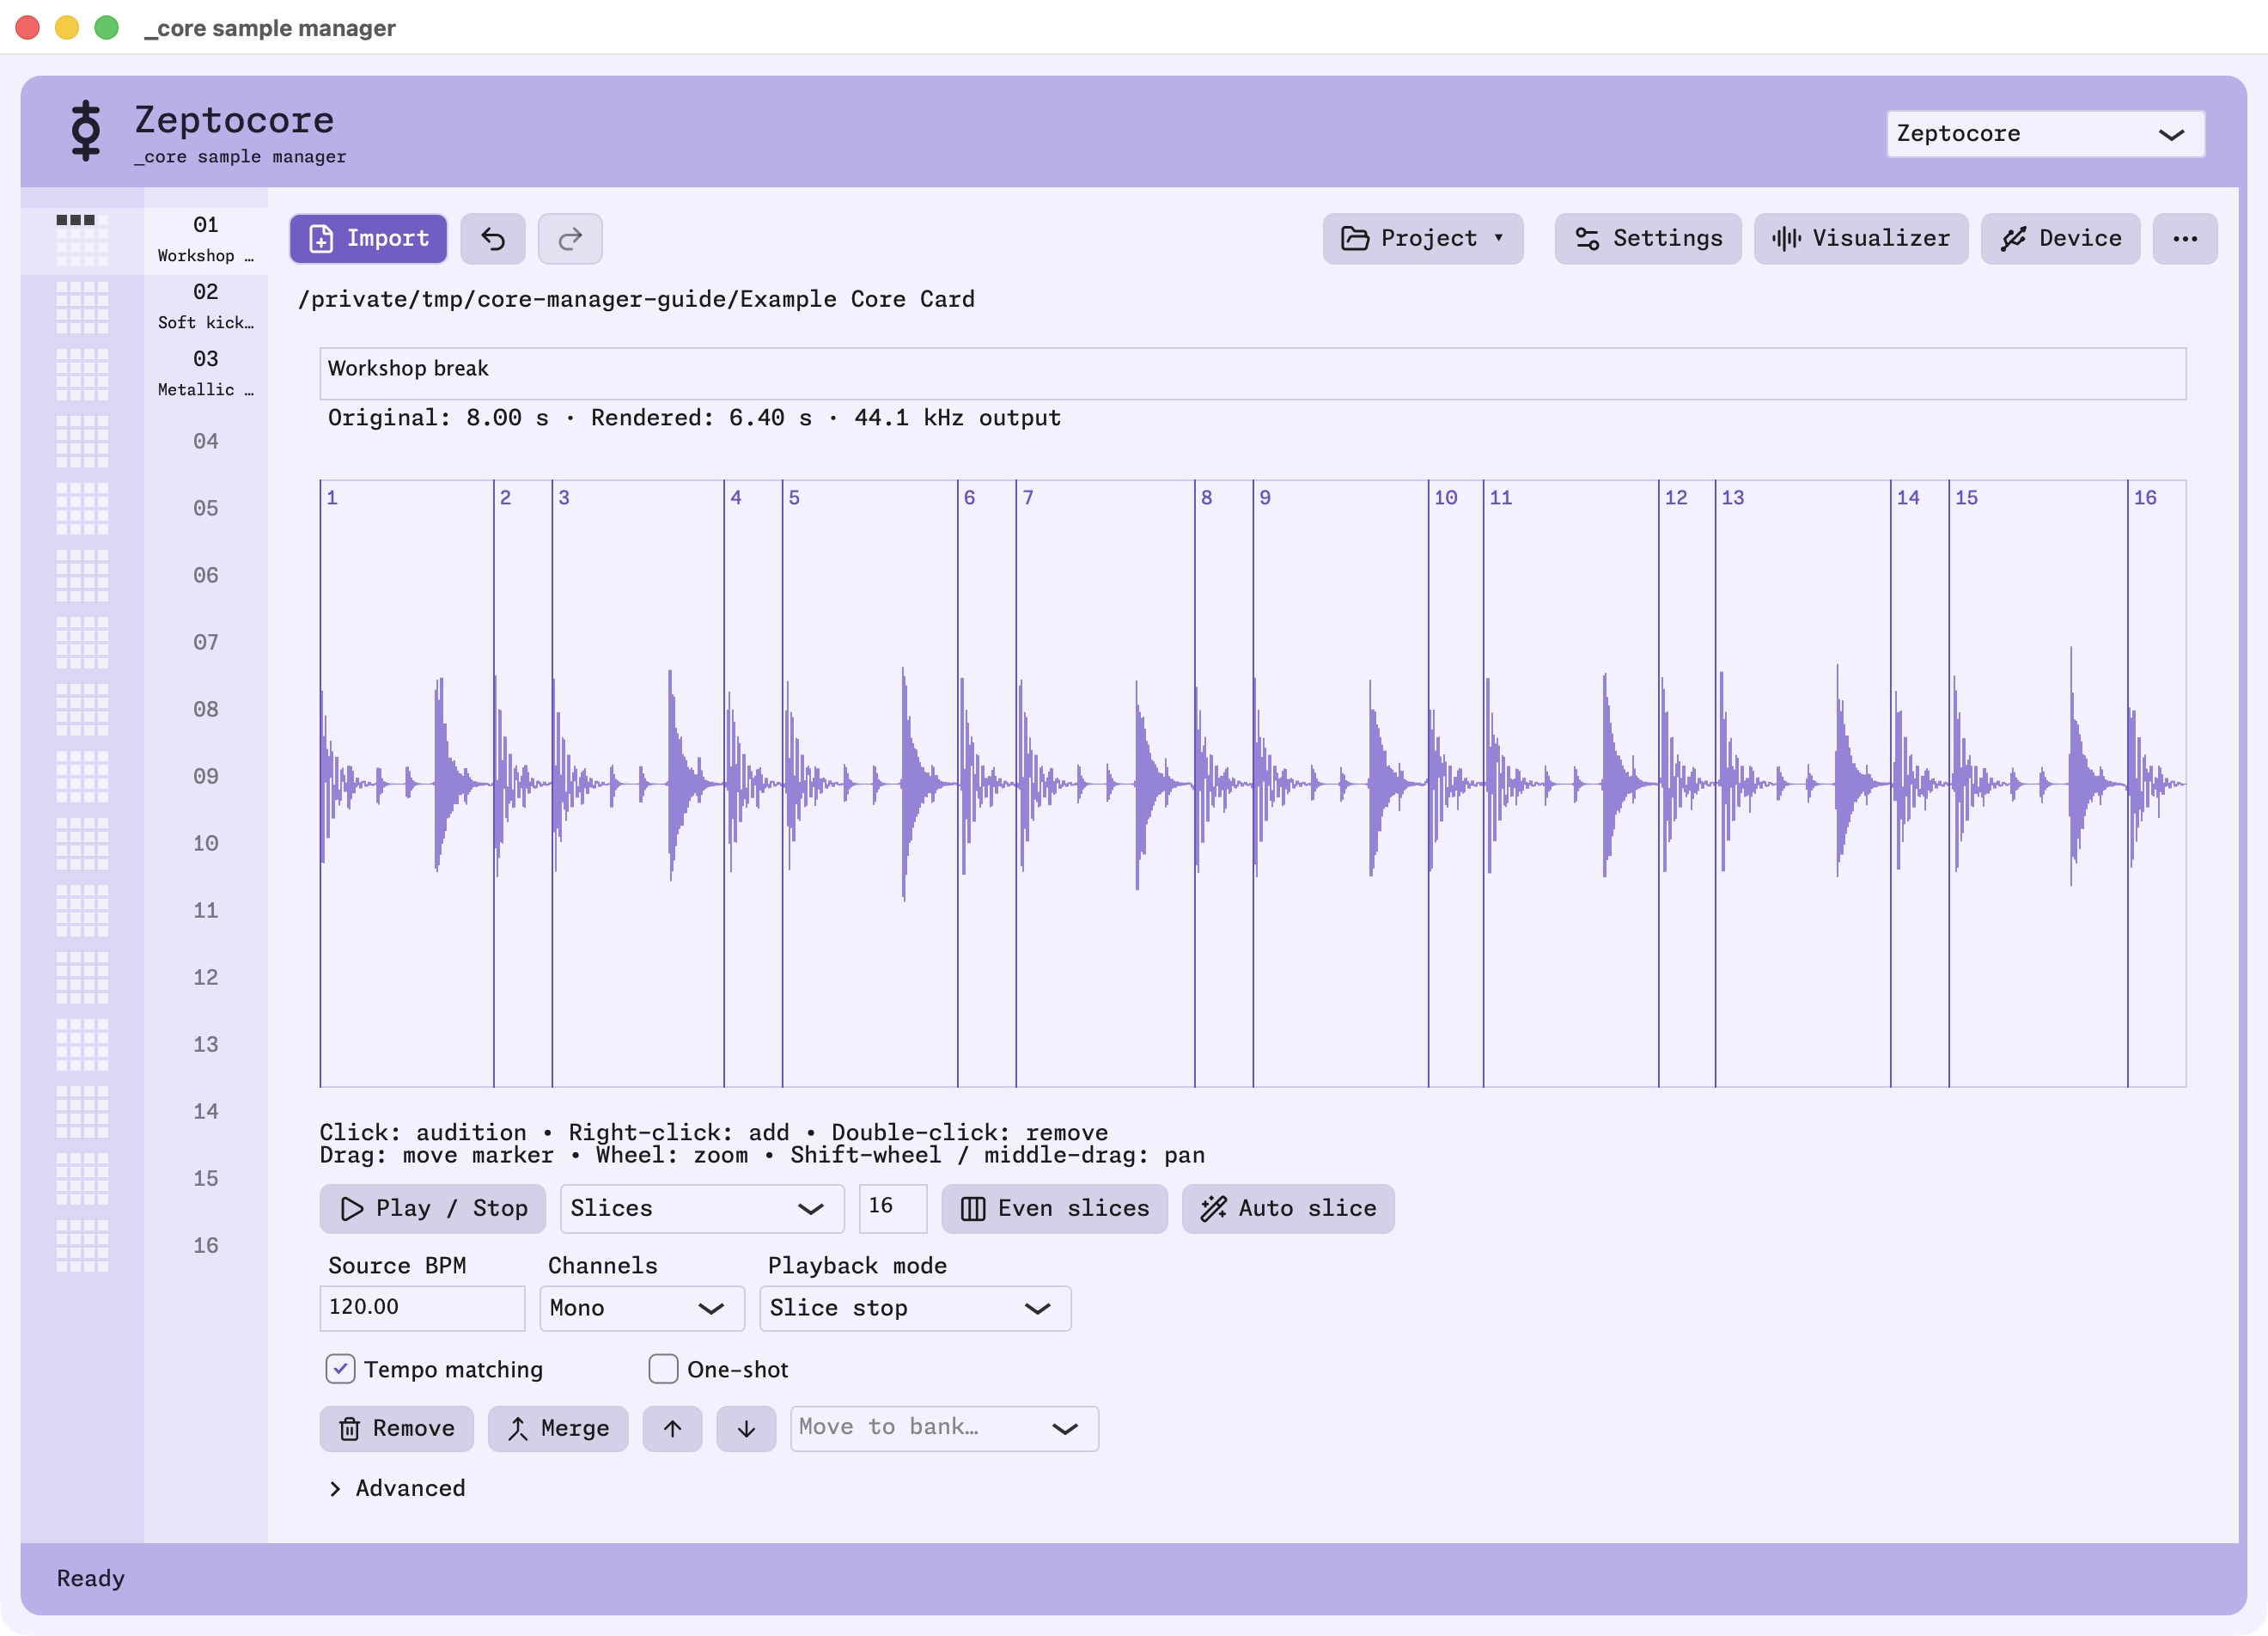
In v8.1.0, Ready means the audio and edits are saved; there are no companion files to generate. Eject the card through your computer's file manager, return it to the instrument, and restart the instrument to load the card and settings.
If you prepared the project in a local folder, copy that folder's contents to the SD-card root: the bank folders, settings, and .core-manager for continued editing. Avoid adding an extra enclosing project folder above the banks. On an existing card, back it up and check any replacement prompts carefully; opening that card directly in the manager is usually simpler.
use the visualizer
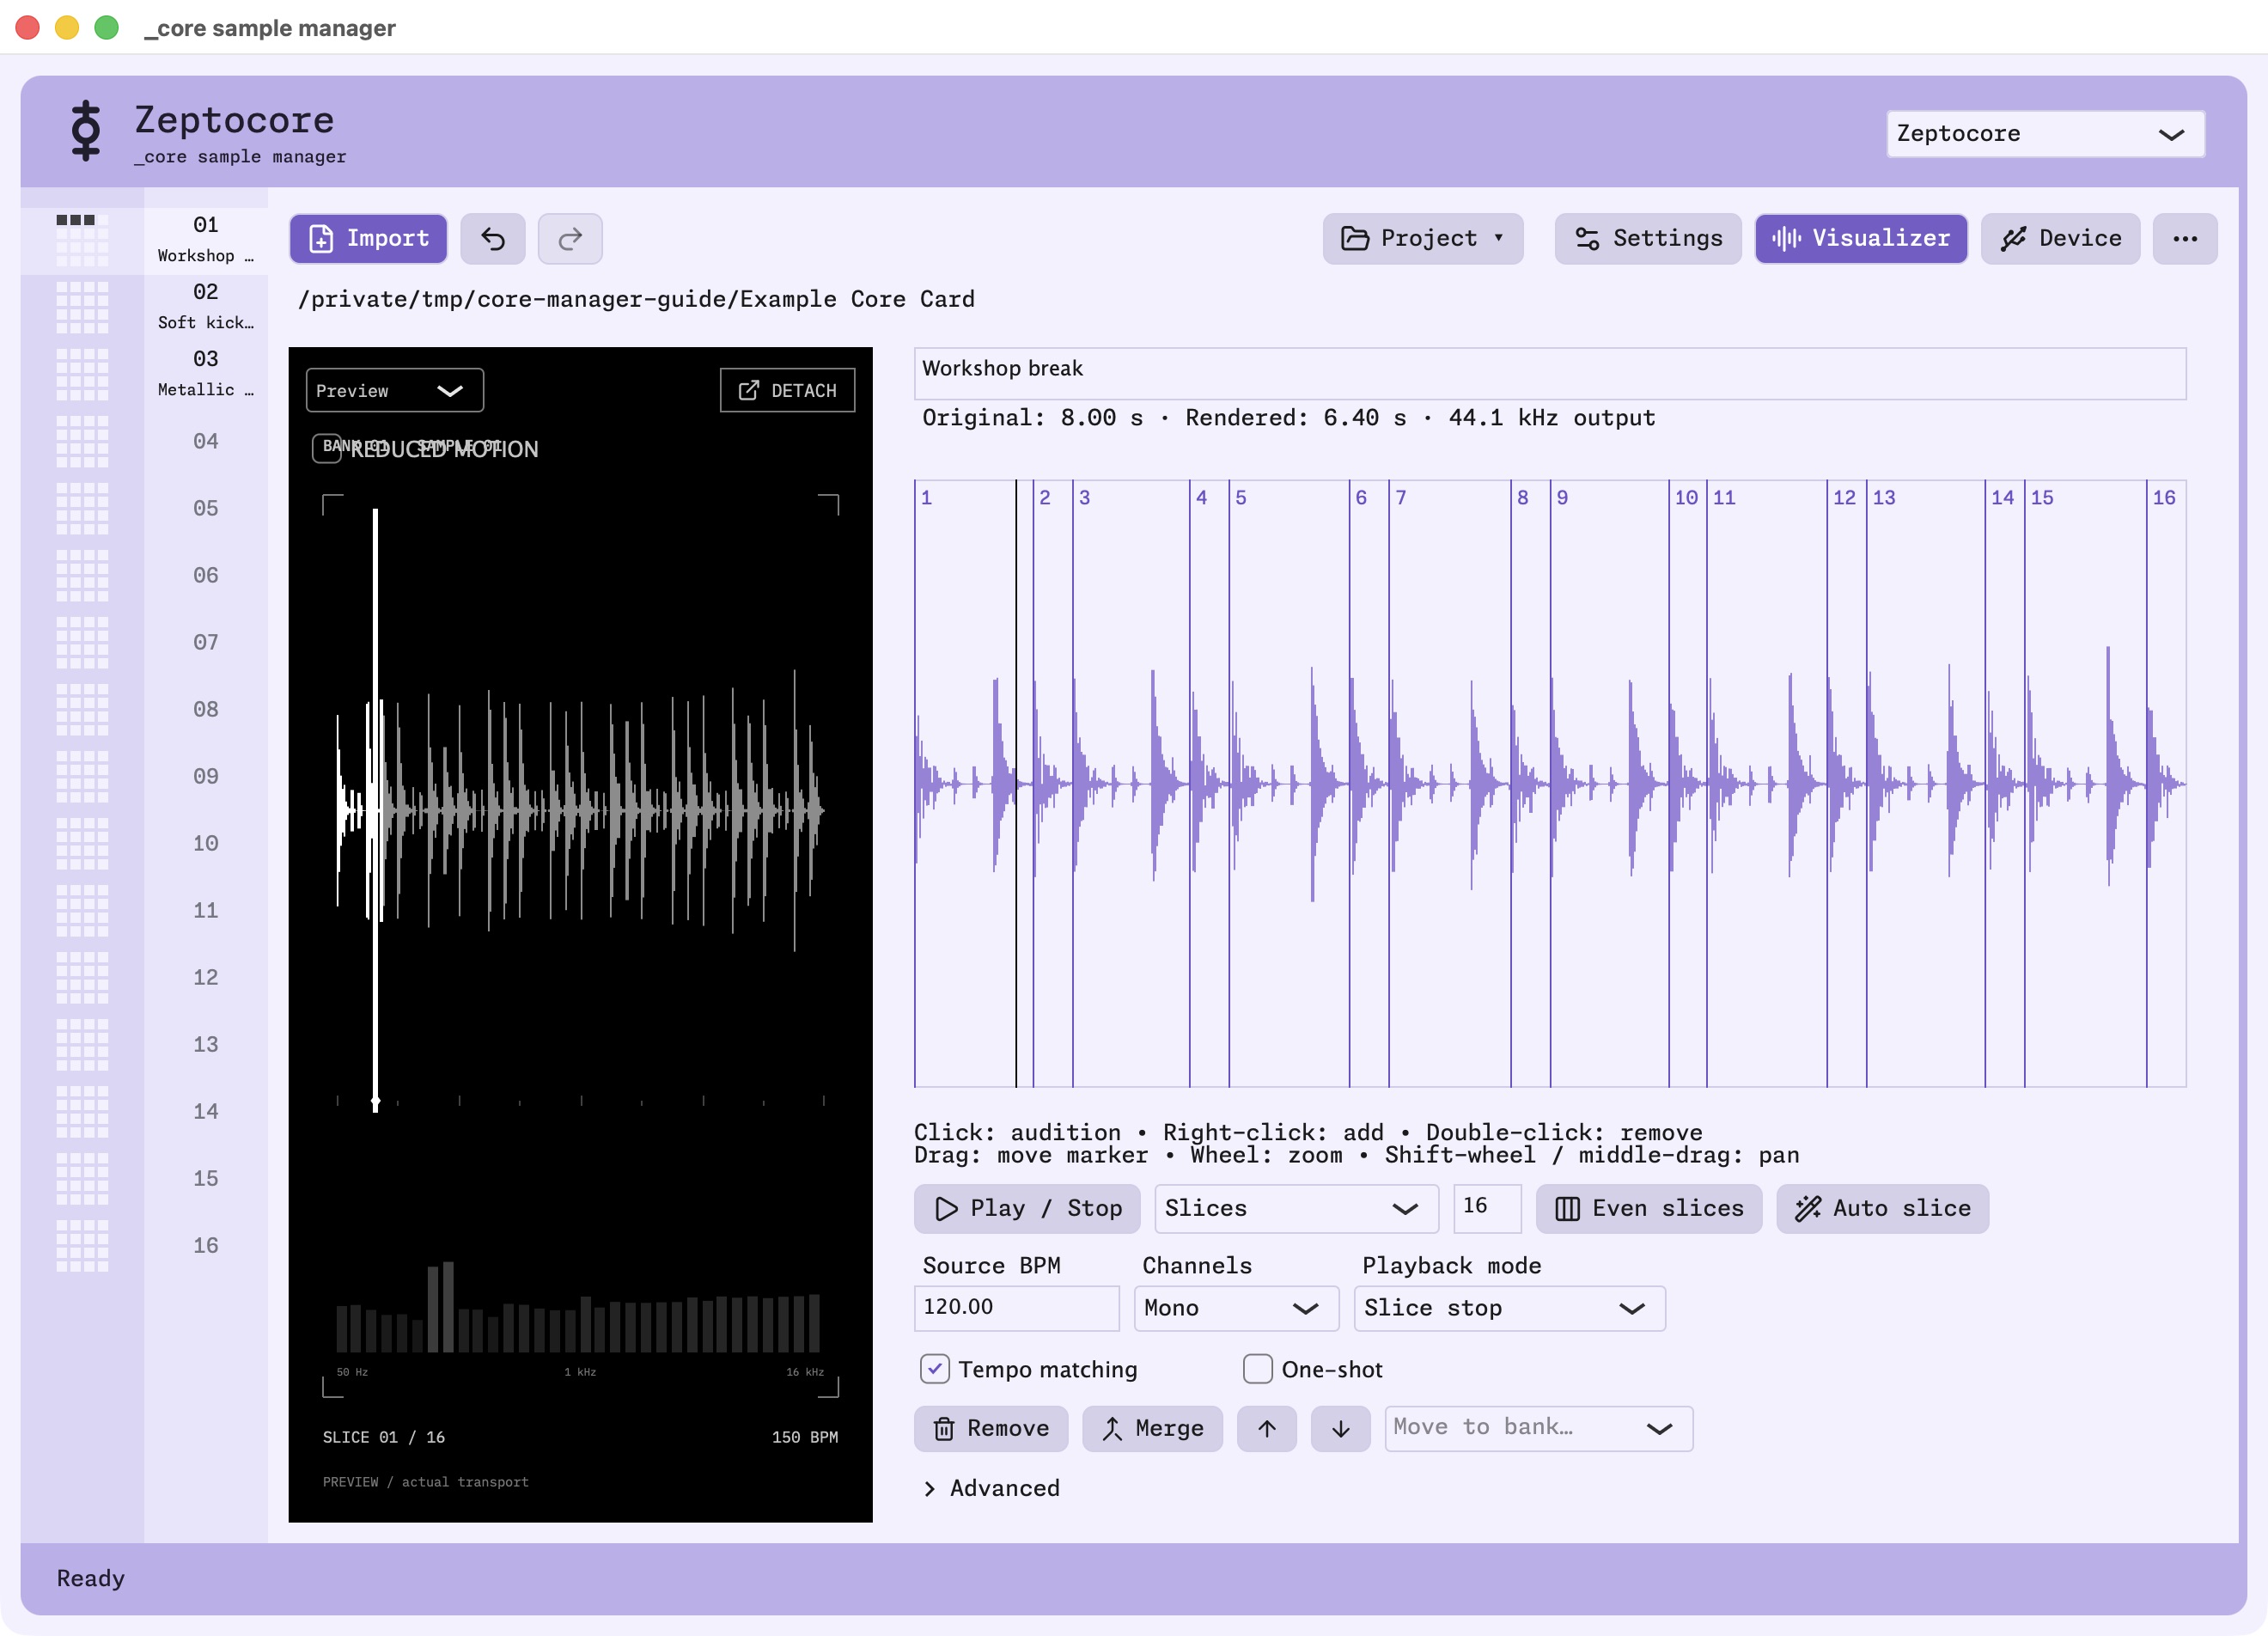
To use the visualizer with your instrument, first download and upload the Visualizer version of the firmware to the device. Select Visualizer under Firmware build, then follow download and install firmware. Downloading the file alone is not enough; it must be installed on the instrument. The local Preview mode above does not need this firmware.
Click Visualizer and choose Preview to follow the app's own playback. This works with the completed sample you have selected and does not need an instrument connected. Detach opens the visualizer in a separate window.
download and install firmware
A UF2 is the firmware file that runs on the instrument. Samples and settings belong on the SD card. Firmware goes over USB to the instrument's temporary RPI-RP2 bootloader drive. The steps are to download the firmware, enter bootloader mode, then install the firmware.
download firmware
- Click Device, then Firmware if it is not already selected.
- Check Hardware model against the physical instrument. EZEPTOCORE and Ectocore use different files, even when their MIDI names look the same.
- Choose Firmware version → v8.1.0 for this guide. The newest available version for that model is selected initially; Refresh versions checks again.
- Choose Firmware build, then click Download UF2.
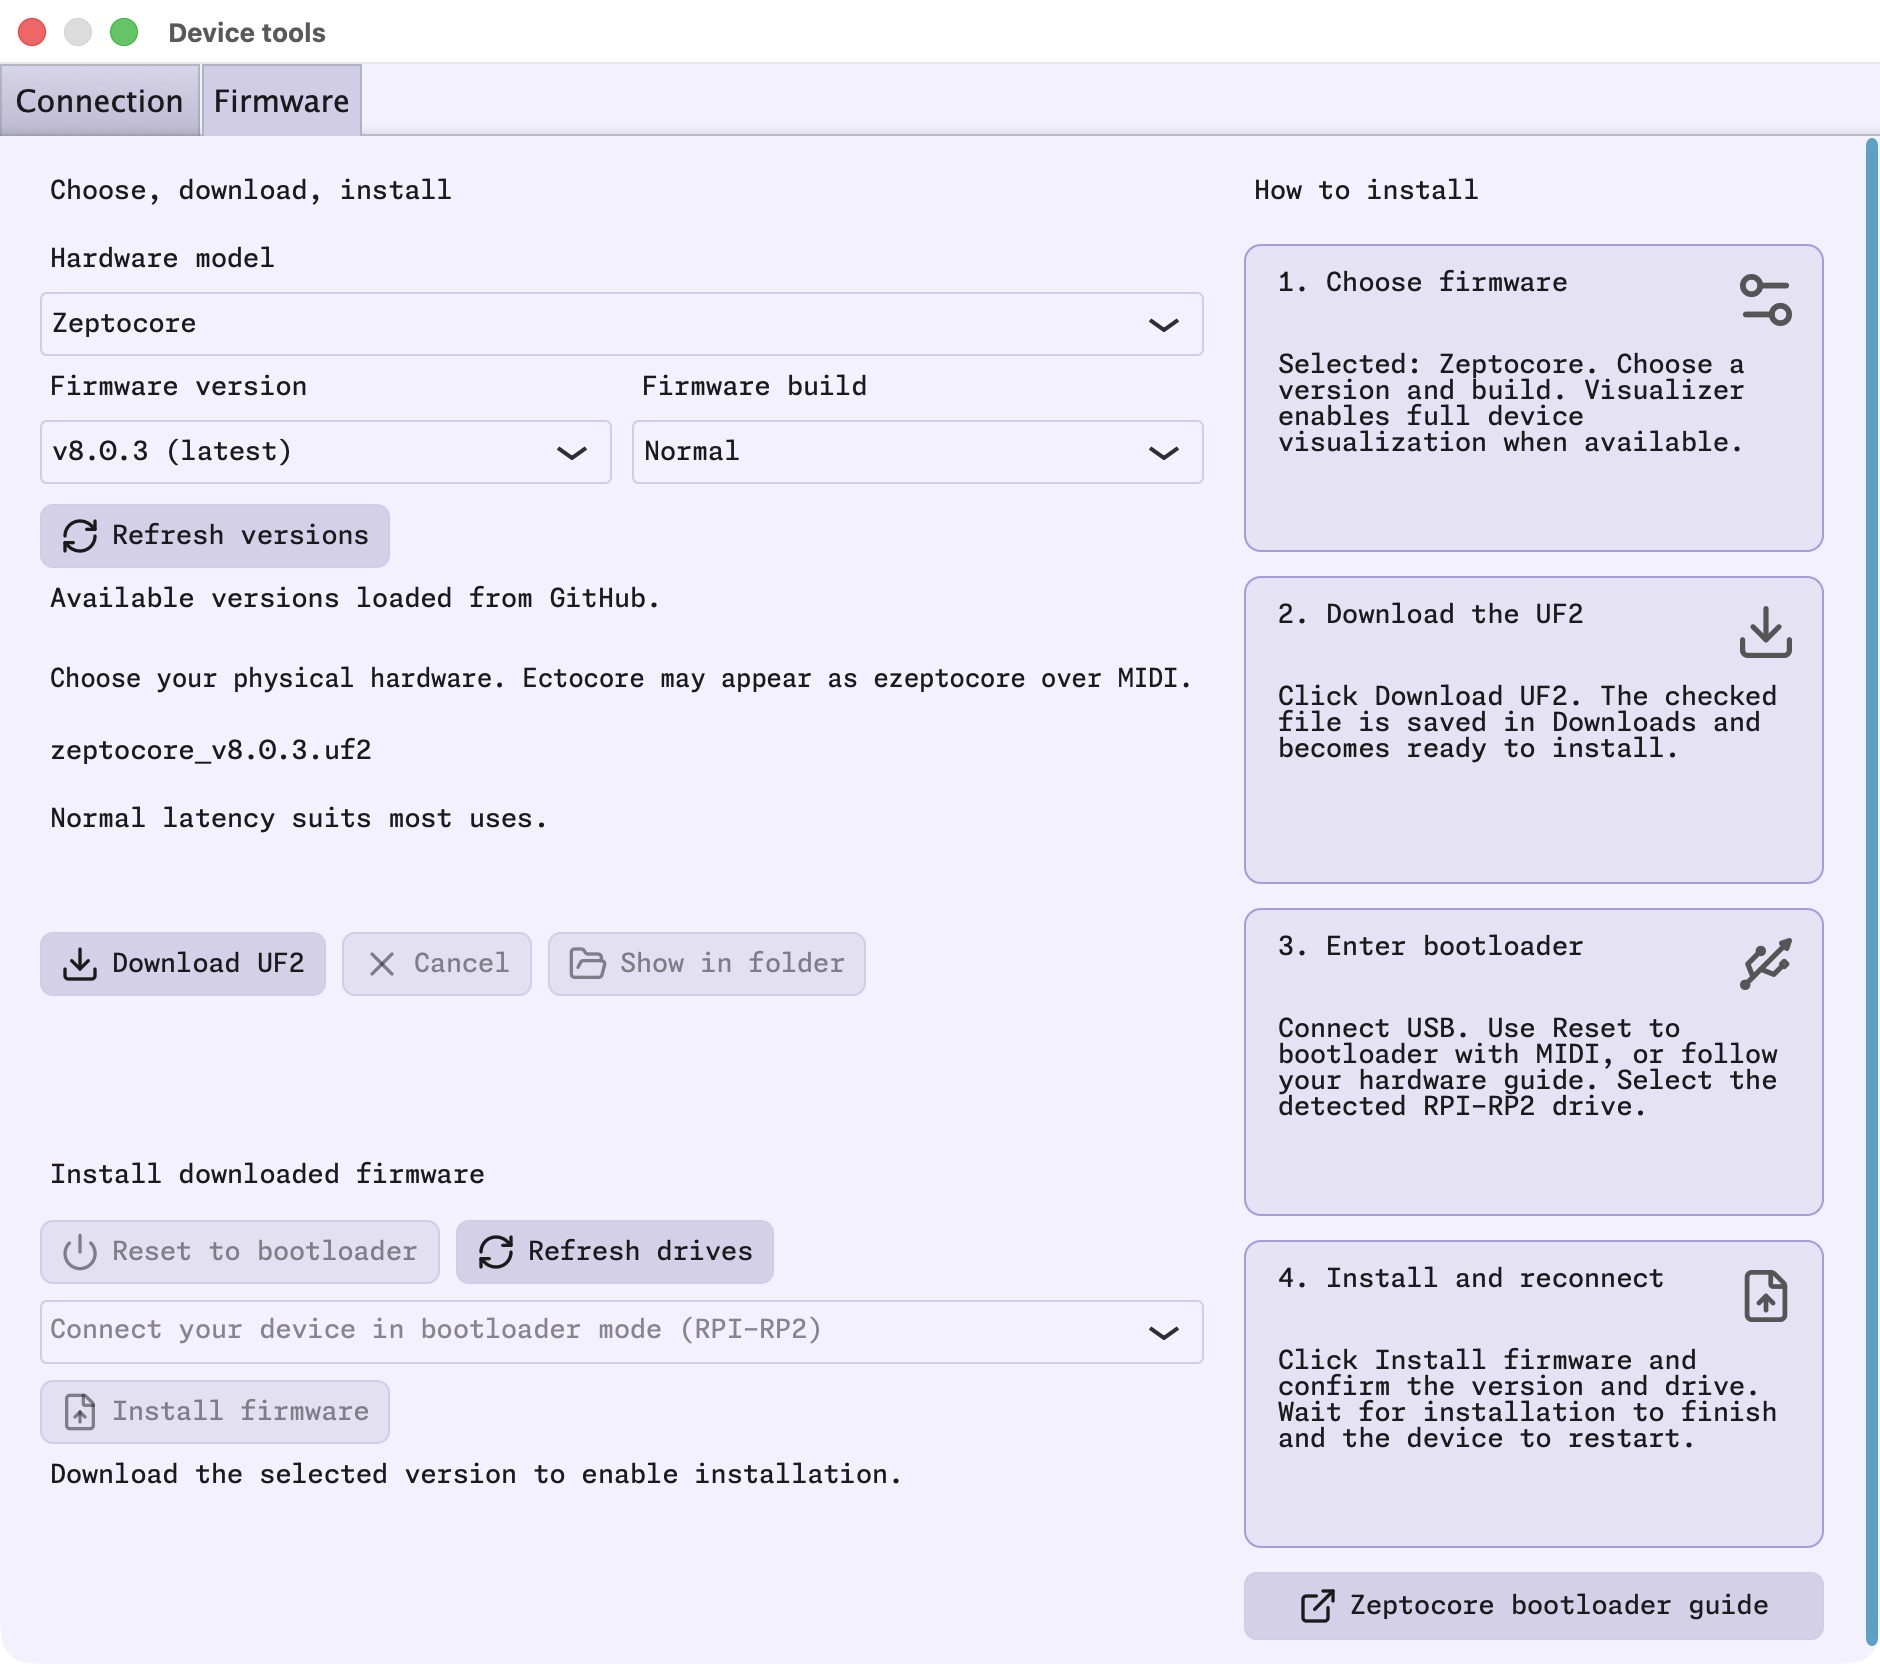
Normal is the starting choice for ordinary use. To use the visualizer with your instrument, choose Visualizer instead, then download and install that UF2. Lower-latency builds trade some processing headroom for faster response. On EZEPTOCORE and Ectocore, overclocked builds provide more effects headroom, while non-overclocked builds prioritize stable internal timing. The app explains the selected build and only lists files available for that model/version.
The v8.1.0 release offers Normal, Low latency, and Visualizer, plus non-overclocked normal and low-latency builds for EZEPTOCORE and Ectocore. It has no ultra-low-latency build.
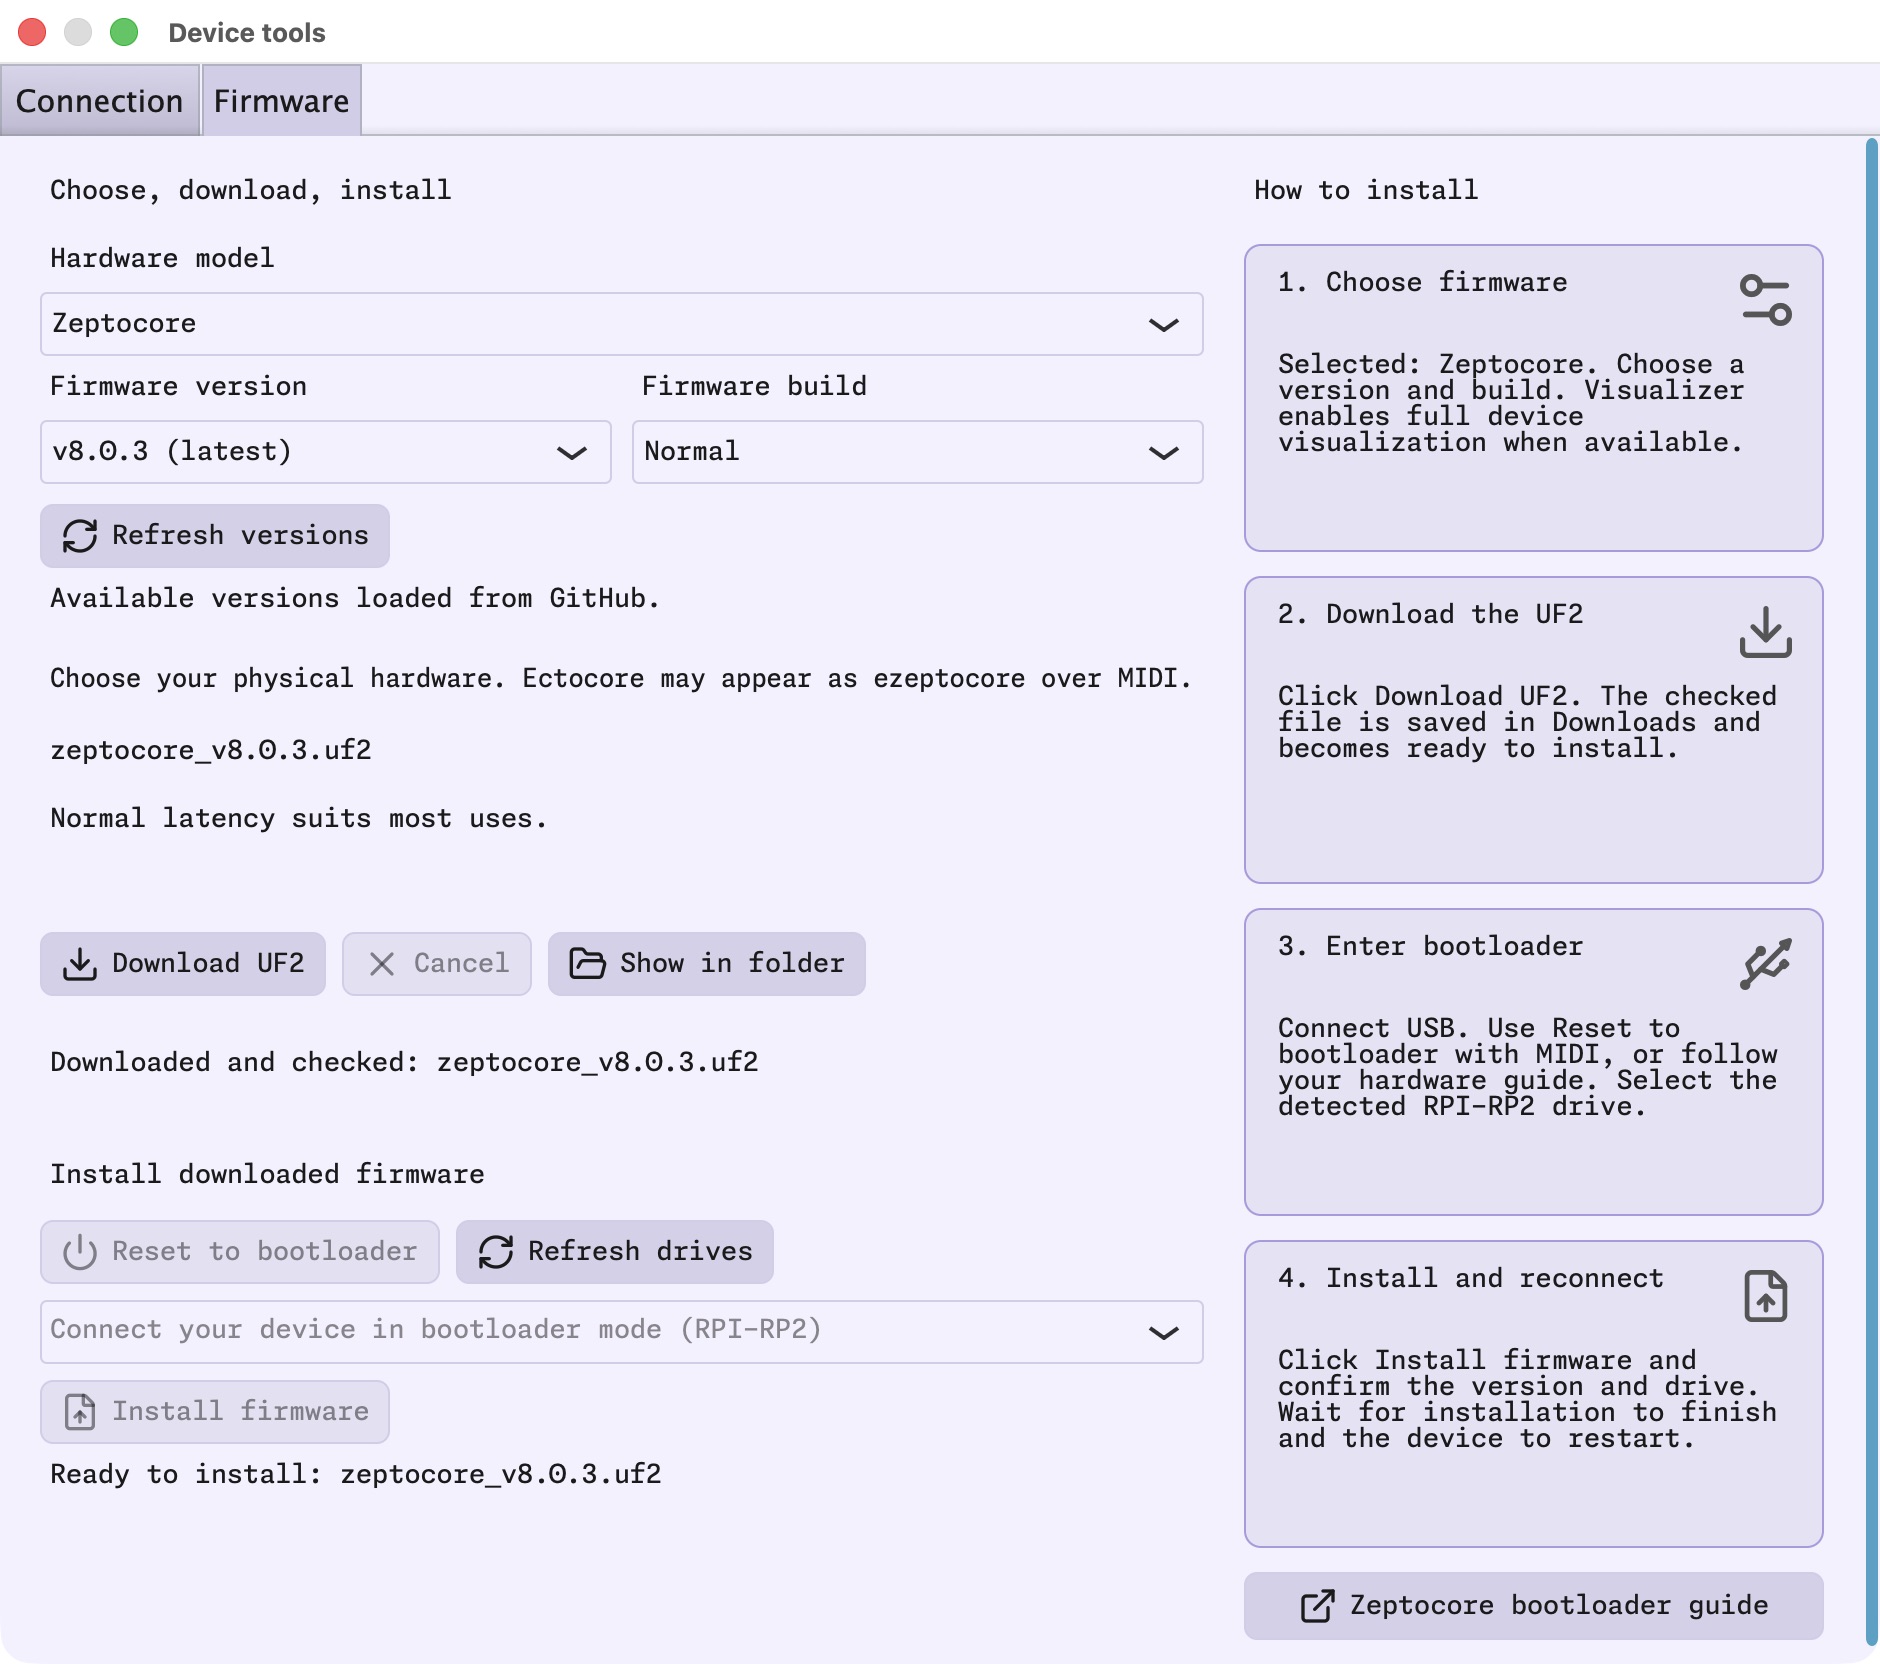
The completed file is checked and saved to Downloads. Show in folder reveals it. Downloading alone does not reset the instrument or install anything.
enter bootloader mode
Connect the instrument with a USB data cable. When a suitable MIDI connection is available, Reset to bootloader can request bootloader mode after confirmation. Otherwise use the physical controls for your hardware:
- Zeptocore: connect USB-C while holding BOOTSEL beside the USB-C jack; keep it held while pressing the nearby NRST button. The Zeptocore upload guide shows the controls.
- EZEPTOCORE: hold the small rear button, press the front-panel RESET, then release the rear button. If you need to remove the module to reach the rear, switch off and unplug the case first. See the EZEPTOCORE firmware guide.
- Ectocore: Similar to the EZEPTOCORE press and hold the boot button on the back panel and press the reset button on the back panel while plugged in with USB. See the Ectocore firmware guide.
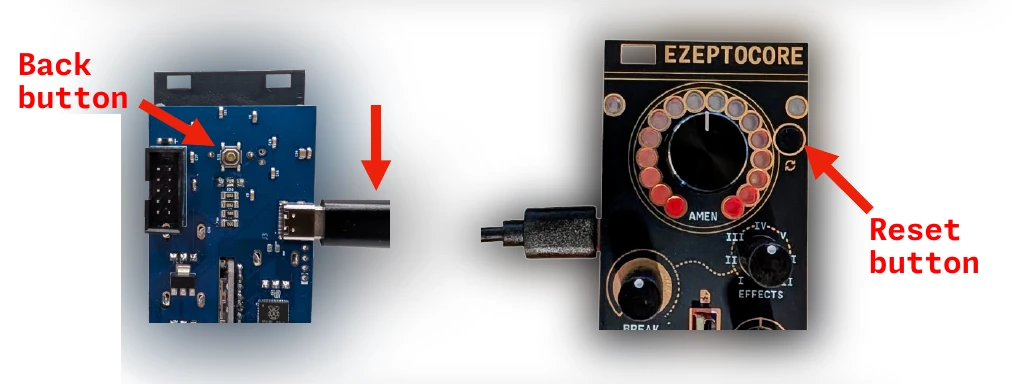
The computer should now show RPI-RP2. That is the destination for the firmware, even if your SD card is also connected.
install firmware
The app selects a single detected bootloader drive automatically. Use Refresh drives if it has not appeared, or choose the correct drive when more than one is connected. Click Install firmware, check the downloaded filename and destination in the confirmation, and confirm. Wait for the copy to finish and the device to restart.
The installer uses the completed download matching the selected hardware, version, and build. If you change a selector, download the matching file before installing. There is no separate local-UF2 picker in this version.
You can also use Show in folder and copy the downloaded UF2 onto RPI-RP2 in Finder or your file manager. The drive disconnects when the instrument accepts the firmware and restarts. Reconnect the MIDI ports if necessary, then query the version under Connection where supported. If you installed the Visualizer build, return to use the visualizer to connect it to the display.
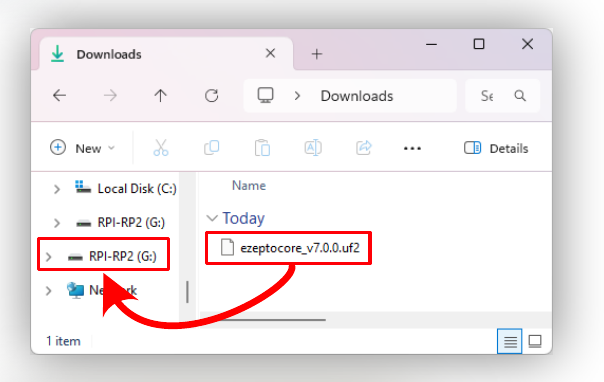
The app screenshots here show real downloads and the installation controls without a connected bootloader drive. The hardware illustrations come from the existing EZEPTOCORE manual; the filename in its copy example is an older release. A physical flash was not performed for this walkthrough.
troubleshooting
| What you see | What to try |
|---|---|
| No samples after opening a card | Open the root containing the bank folders, rather than a bank or an extra enclosing folder. |
| An import will not fit | Select another bank; each one holds 16 samples. |
| A tempo sounds twice as fast or slow | Check Source BPM before changing Render BPM or the instrument's tempo matching. |
| Saving cannot finish | Reconnect the same volume, check free space/write access, then use More → Retry pending save. Wait for Ready before ejecting. |
| Files changed outside the app | Use More → Reload / reconcile completed card to reconcile the card contents. Back up the complete project first if you are unsure which changes you want. |
| No RPI-RP2 drive | Check the data cable and model-specific bootloader steps, then Refresh drives. The ordinary SD-card volume is a different destination. |
| A firmware download fails | Check the connection and Refresh versions. Retry the published file rather than renaming another model's UF2. |
| Device visualization has no slice tracking | Download and install the Visualizer firmware build, then check both MIDI ports. Preview mode is a useful check of the local project. |